Studio Runner basics
Studio Runner allows you to run a Studio project by sending data to the project’s API endpoint via a user interface.
Anyone can run a published project using the Studio Runner web page. Once a project is enabled, all someone needs is the project ID, a valid API key, and suitable data. This makes Studio ideal for enabling non-Studio users to run a project as part of their manual workflow.
We have divided this topic into these sections:
Requirements
To run a project, you must first publish AND enable it for Studio Runner. You also require the project’s ID and API key. To perform these tasks and obtain the necessary details, follow these steps:
Go to the project’s Publish view and click the PUBLISH button.

Once you've published, you’ll see a congratulatory message to let you know that your project has gone live. This message provides you with the URL corresponding to your project’s API endpoint. You don't need this for Studio Runner.
Open the Publish view's API tab, scroll down to the API Key section, and click GENERATE API KEY.

Click the clipboard icon in the pop-up window to copy the API key. You need this for Studio Runner.
Tip
The key is displayed only once, so it's good practice to copy-paste it into a document and save.
Still on the API tab, scroll down to the Studio Runner section and toggle the switch to Enabled. This generates a unique ID number for the project. You need this for Studio Runner, so copy the ID using the clipboard icon and save it with your API key.

Enabling the project makes the LAUNCH STUDIO RUNNER button available. Click this to open Studio Runner in a separate browser tab.
People who don't have a Studio account can access Studio Runner via the URL https://app.studio.arria.com/runner, but remember that they can't run a project until someone with Studio access has enabled the project for use.
Important
Arria Studio and Studio Runner both require Google Chrome.
Configuring the application
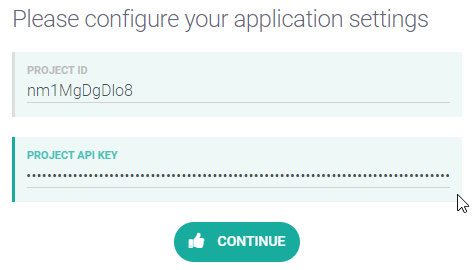
The first screen you see when you open Studio Runner is the Application Configuration screen.
The first requirement is to populate the PROJECT ID and PROJECT API KEY fields.

Studio Runner also has a settings page, which you access by clicking the ADVANCED SETTINGS button. Note that you don't need to select settings before running a project — visit the settings page only if you want to change the default values for narrative generation.

Most of the settings control the formatting of the output. For example, you can choose whether to generate the content as plain text or HTML. All settings are optional. See Studio Runner advanced settings for guidance.
Once you have configured the application, click CONTINUE to proceed.
Uploading data
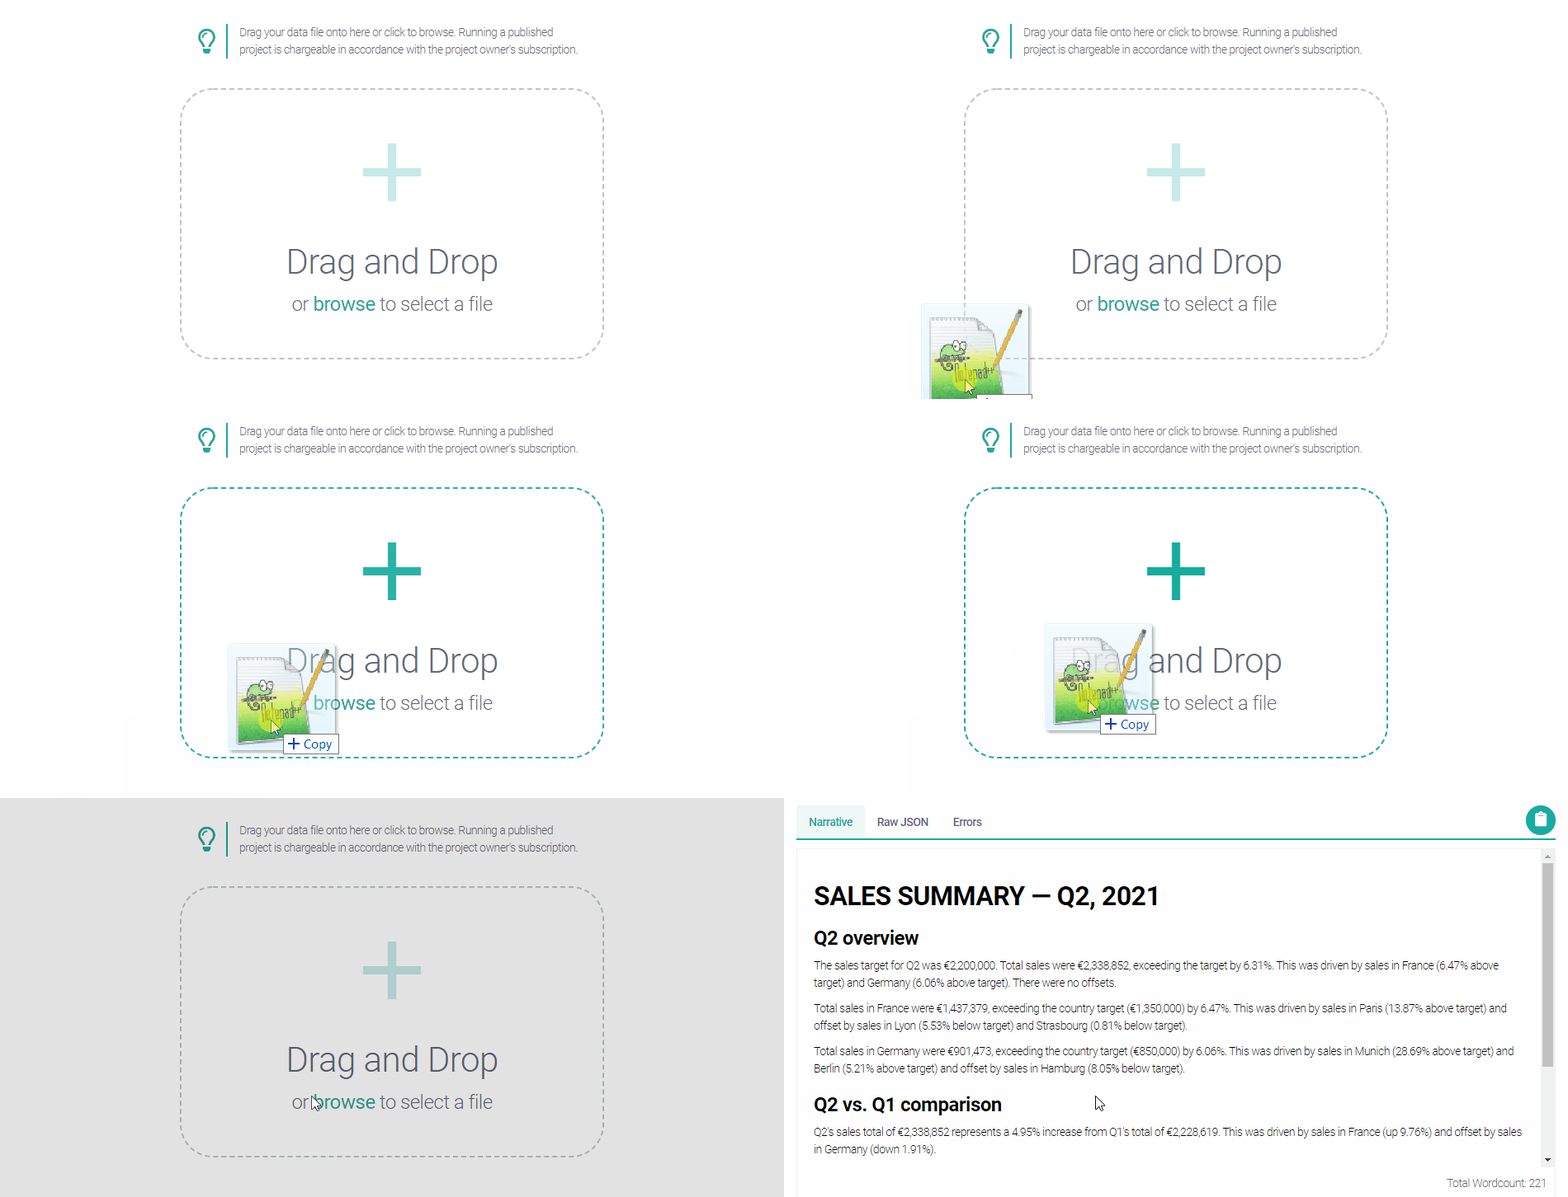
To run the project, drop a data file in the Drag and Drop area. Alternatively, click browse and select the file using the pop-up navigation window. If the data is correct for the project type, Studio Runner will generate narrative text.

The data file you send to Studio Runner can be either:
A CSV or JSON file like the type you upload in Studio.
A file in the API data format.
Note
Studio includes a tool that converts project data files (CSV or JSON) into the API Data format. This lives in the API tab within the Publish view. Please see Publish View > Convert data to API format for guidance.
Important
The uploaded data must replicate the structure of the data in the project you're running. For example, if the project takes table data, you must upload a data file with the same column headers as those in the project's sample data.
Viewing content
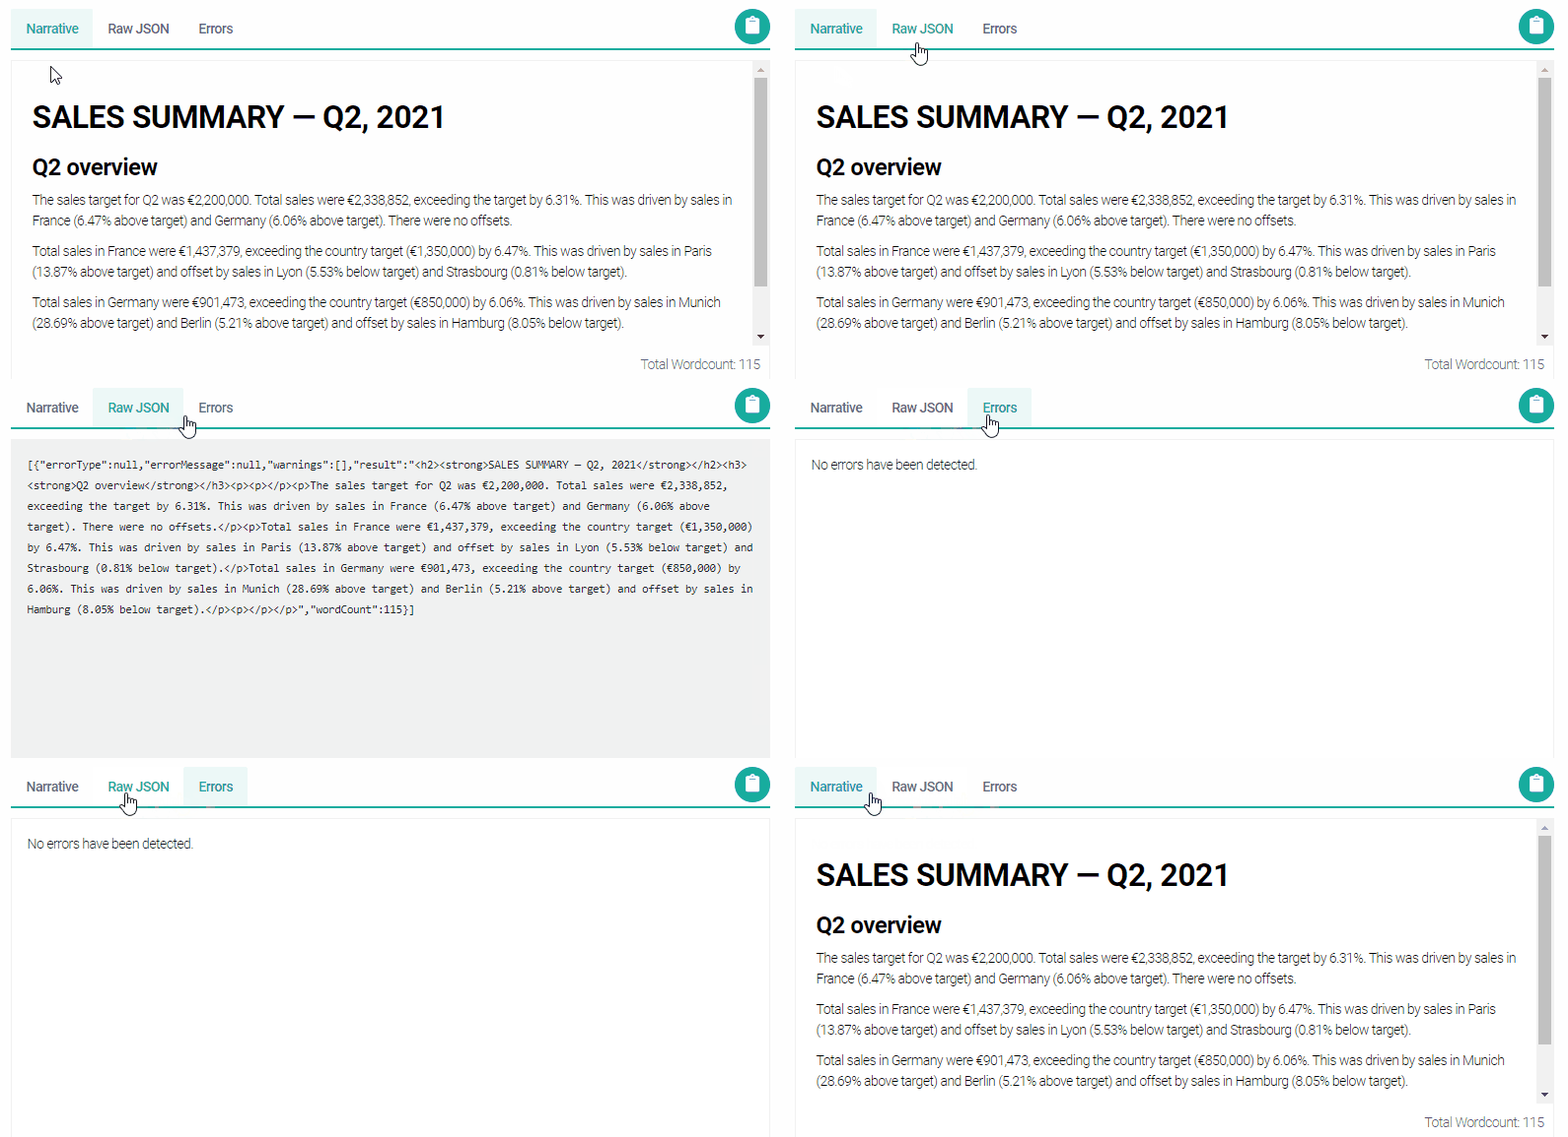
The content pane has three tabs:
Narrative displays the output narrative along with a word count.
Raw JSON displays the raw JSON of the API response object.
Errors displays any errors.

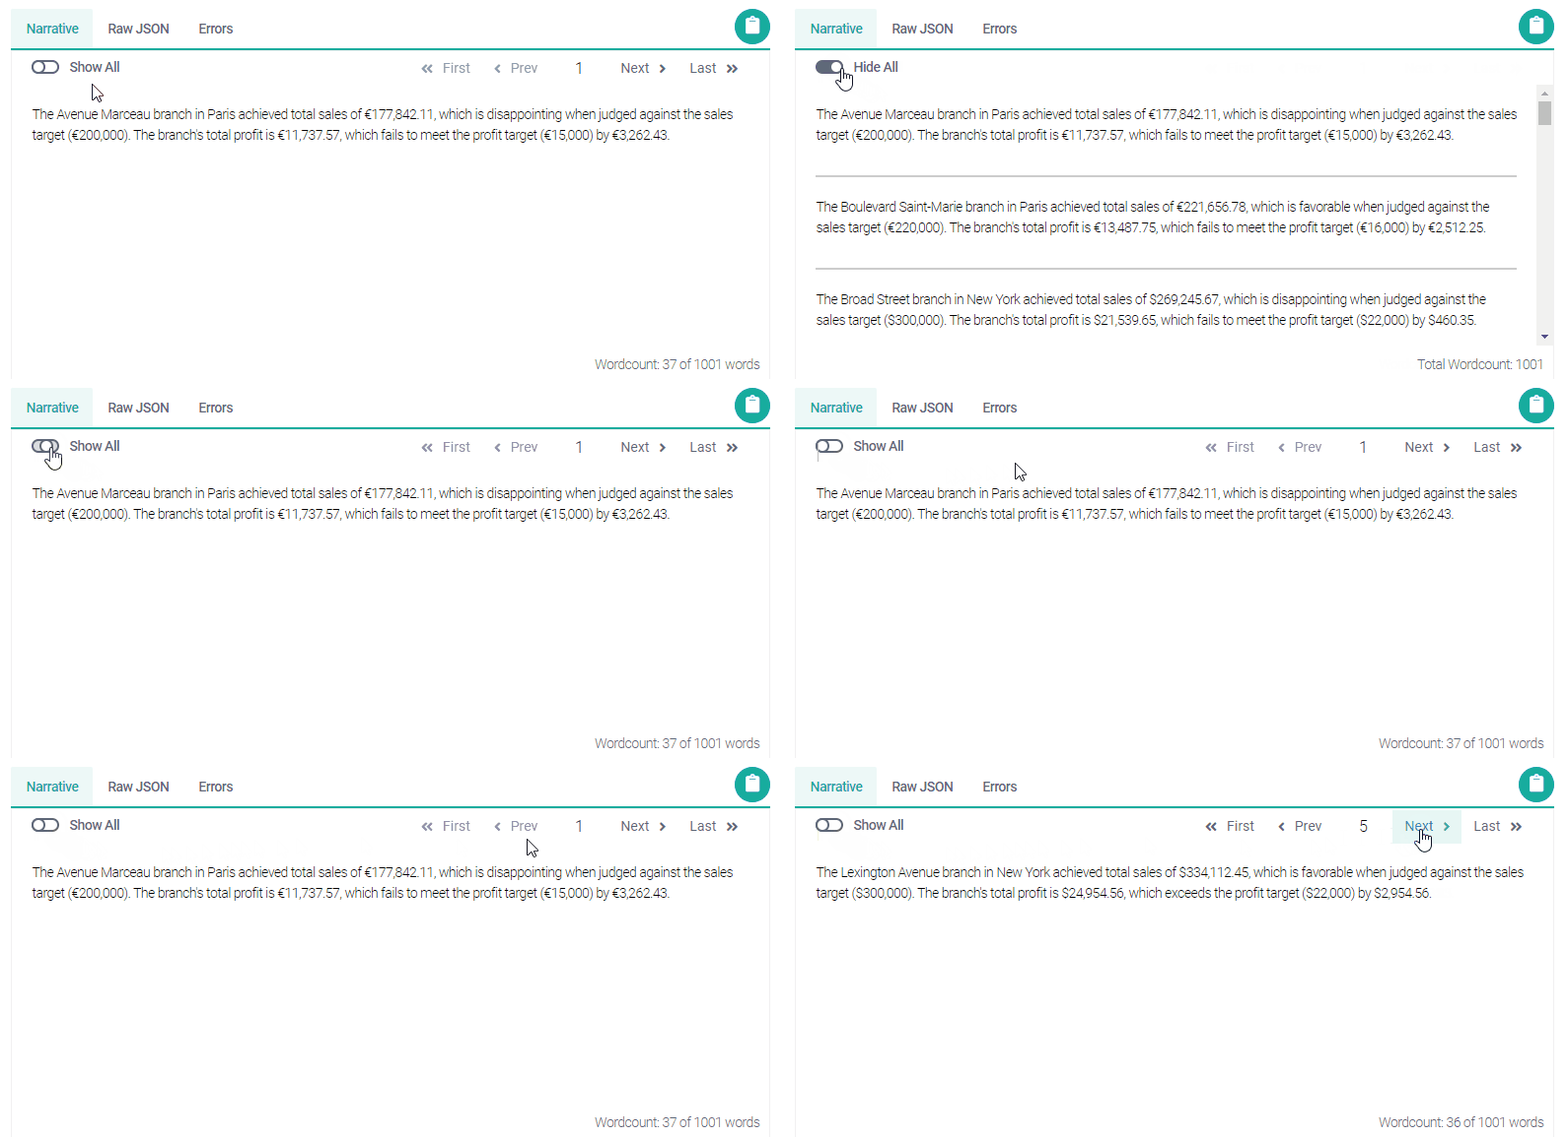
The content pane has extra features when you run a "Describe Each Row" or "Describe Row in Context" project. These projects generate a narrative for each table row, so there are extra navigation buttons allowing you to view the narratives separately or together.

Note
The Show All / Hide All toggle also works on the Raw JSON and Errors tabs.
Copying content
Click the clipboard icon (highlighted) to copy the generated content.

You can copy content in all three tabs: Narrative, Raw JSON, and Errors. You can then paste the content elsewhere.
Note
If you intend to paste the content into a Word, perhaps try the Export Narrative feature instead.
Other features
This section explains the buttons in the top-right corner of the interface.

Working left to right:
Click EXPORT to open the Export Narrative dialog.
Click Regenerate (the cycle icon) to regenerate text from the current data.
Click Application Configuration (the cog icon) to change the settings or enter the ID and API key for another project.
Click Import New Data (the arrow icon) to upload a new data file.
Important
Each run of a project — that is, each regeneration — is chargeable as per the product owner's subscription. If you click Regenerate, you receive a message confirming this.