Versioning

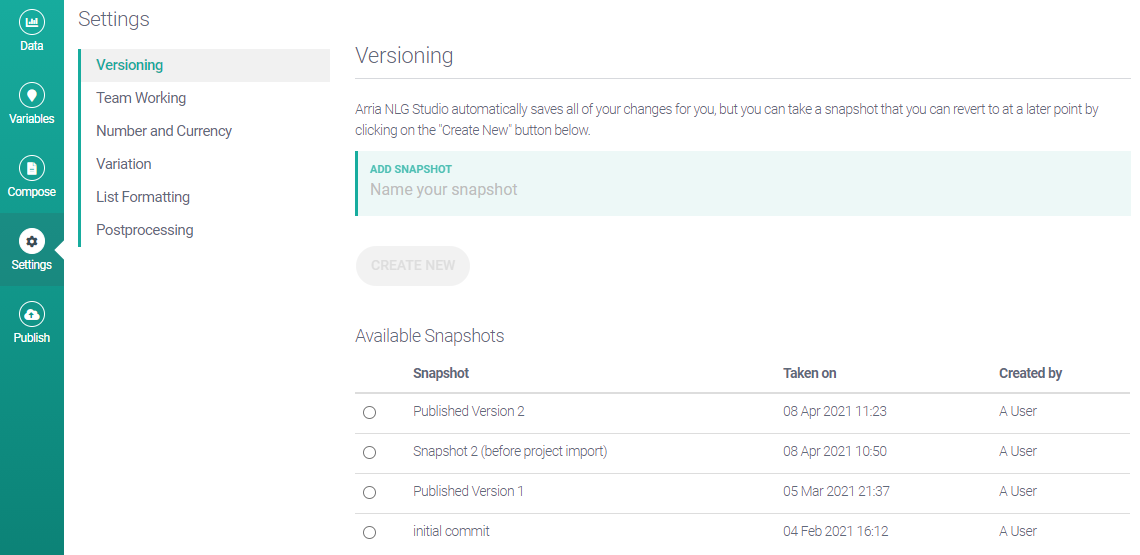
Studio automatically saves changes to your project, but you may want a saved version of the project that you can revert to later. On the Versioning tab, you can create a project snapshot at any time. You can also create a new version of the project by importing content from another project's export file. These options are explained further below.
Note
Please be aware that Studio automatically takes a snapshot whenever you publish your project. Published project snapshots are saved as Published Version 1, Published Version 2, and so on.
Creating a version
Creating a version is simple:
Click Settings to access the Settings view.
Click Versioning to access the Versioning tab (if not already selected).
Click in the ADD SNAPSHOT field and type a name for your snapshot.
Click on the CREATE NEW button.
Note
The CREATE NEW button is unavailable until you name your snapshot.
Once your version is saved, the snapshot details will be included in the Available Snapshots table. The table shows the snapshot name, the date and time when the snapshot was created, and the name of the user who created it.
Reverting to a version
To revert to a previous version of your project:
Select a snapshot from the Available Snapshots table by clicking its radio button.
Click the RESTORE button.
Note
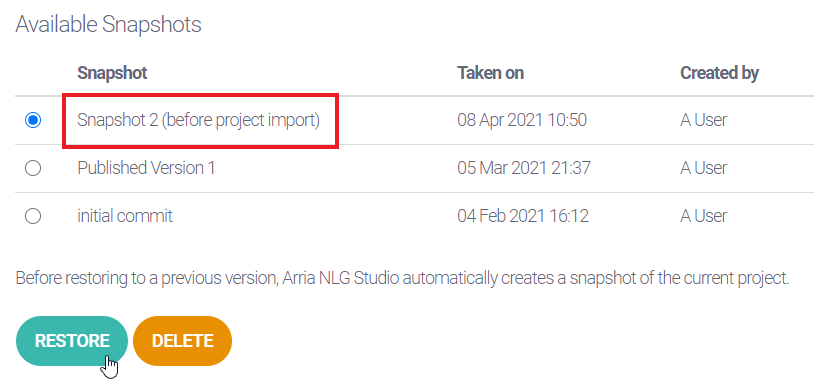
Before restoring to the previous version, Studio automatically takes a snapshot of the project in its current form, meaning you can revert to that version later if required.
Deleting a version
To delete a previous version of your project:
Select a snapshot from the Available Snapshots table by clicking its radio button.
Click the DELETE button.
Click YES to confirm.
Note
Deleting a version deletes it permanently.
Importing a version
This option allows you to update your project by importing content from another project's export file.
This means you can copy your project, update the copy separately, then import the updated version back into the original project. This way you can update your project from a copy while retaining the original project's API key and endpoint.
When you import a version, the project's name, scripts, folders, variables, settings, sample data, and lex rules are taken from the selected project file and inserted into the current project, overwriting the existing content.
Studio automatically creates a snapshot of the project before the import, meaning you can roll back to the pre-import stage if required.
Note
The project you import from must be of the same type — e.g. if yours is a "Describe the Table" project, you can import content only from other "Describe the Table" projects.
To import content from another project file:
Scroll down to the Import Version from Another Project section.
Click the IMPORT INTO PROJECT button.
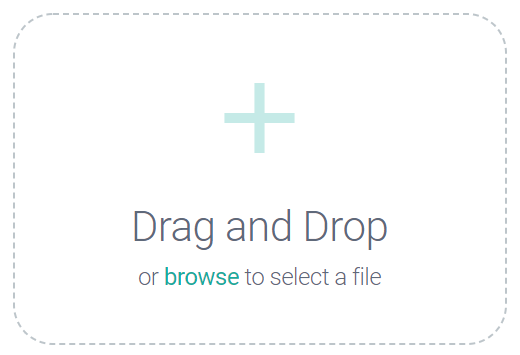
This will take you to this screen:

Drag and drop the project export file (JSON format) into the Drag and Drop area, or click the browse link and select the file using the pop-up navigation window.
After selecting the file, you are returned to the Versioning tab. The Available Snapshots table now includes a pre-import snapshot of the project, which you can revert to if required:

Tip
See Project Portal > Exporting projects for guidance on creating a project export file.