Variables View
The Variables view displays the variables that are available for you to use in your project.
Variables are used to refer to items in your table or JSON data. There are two basic types of variable: automatic variables, which the system creates for you from your data; and user-defined variables, which you create yourself. For more information, see Key concepts > Variables
Index
The variables list

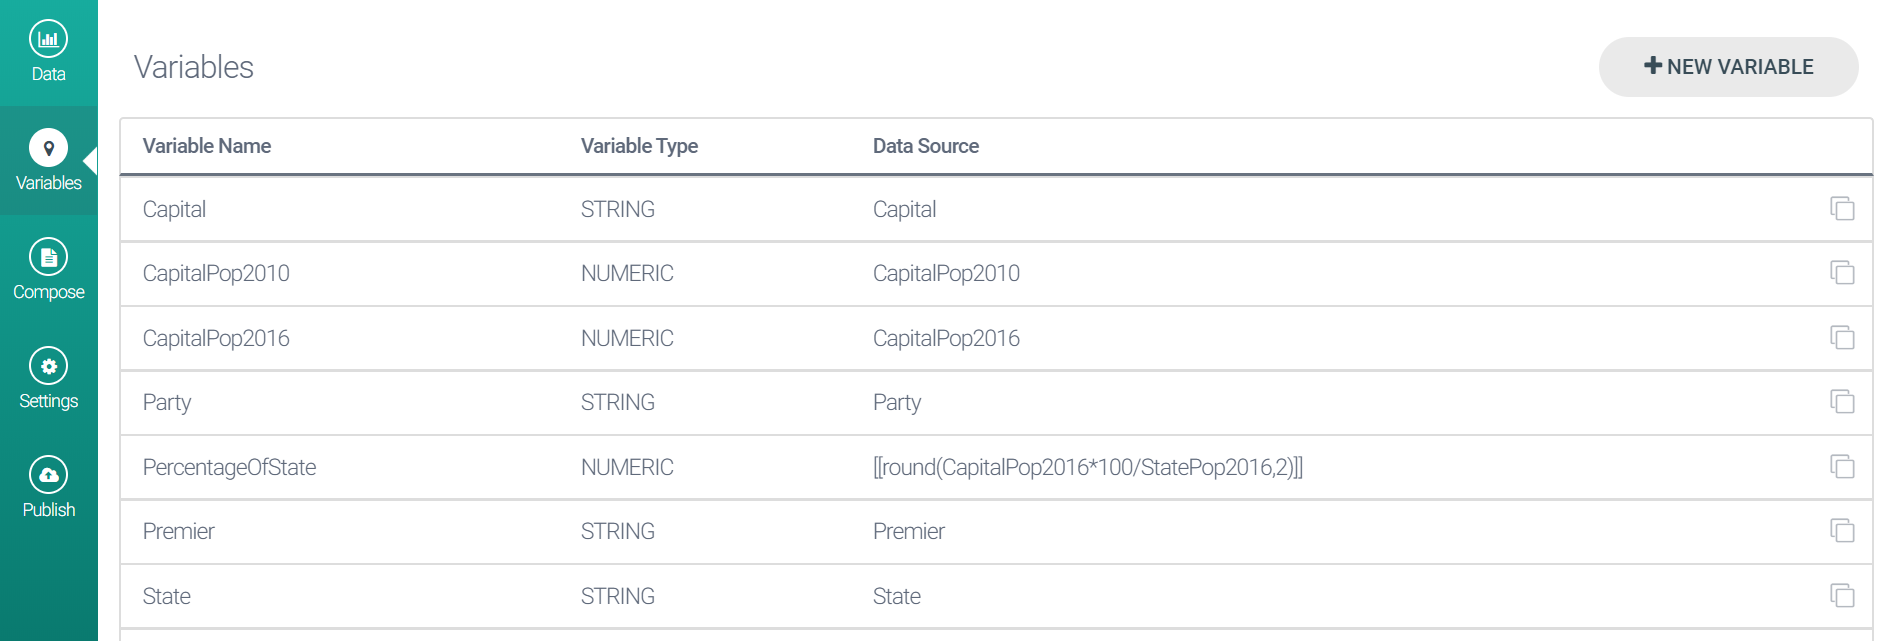
The variables list shows all variables in alphabetical order by name. For each variable, the list shows the name of the variable, its type, and its source.
For table projects, Studio automatically creates at least one variable for each column in the data table. The variable names are automatically constructed by Studio to ensure they are valid. A variable name must be no longer than 40 characters in length, must begin with an alphabetic character, and can contain only alphabetic characters, digits and the underscore character.
If you have column headers that do not meet these specifications, Studio transforms the column header name appropriately to produce a valid variable name, using the following set of rules:
Spaces are replaced by underscores.
Any other non-alphanumeric characters are removed.
If the column header name begins with a number (as in, for example, ‘2017’), the prefix ‘v_’ is inserted in front of the number (for example, ‘v_2017’).
If the variable name is longer than 40 characters, it gets truncated to 40 characters.
If the resulting variable name is the same as an existing variable name, one or more digits are added to the end of both names to make them unique.
Studio automatically creates a new variable for any new column you add to the data table. However, if you delete a column header from the data table, the corresponding variable will still exist in the variables list with a warning that the variable does not have a corresponding column in the data table. This is deliberate, since you may decide you want to maintain the variable but assign it some other source, such as a computation over some other existing column in the data table. However, if you no longer need the variable, you can delete it here.
Variables can be of the following types:
STRING (all project types)
NUMERIC (all project types)
BOOLEAN (all project types)
LIST (all project types)
ROW (projects with table data)
COLUMN (projects with table data)
JSON (projects with JSON data)
DATETIME (all project types)
A variable’s type determines the functions that you can apply to it; for example, you can only perform mathematical functions on variables if they are NUMERIC, and you can only make a variable lowercase if it is a STRING. Studio attempts to guess the type of a variable according to its contents. If Studio gets this wrong, or if you want to change the type of the variable for some other reason, you can manipulate this by editing the variable.
The data source for a variable is the data that is used to give the variable a value. In the simplest case, the data source will be the column in your data table that corresponds to the variable; however, you can define the source of a variable to be an arbitrary ATL expression, so that you can define variables that are the result of complicated computations.
Creating new variables
To create a new variable, click the New Variable button at the top right of the Variables view (see the screenshot above). This creates a new variable and opens a dialog to edit the variable.

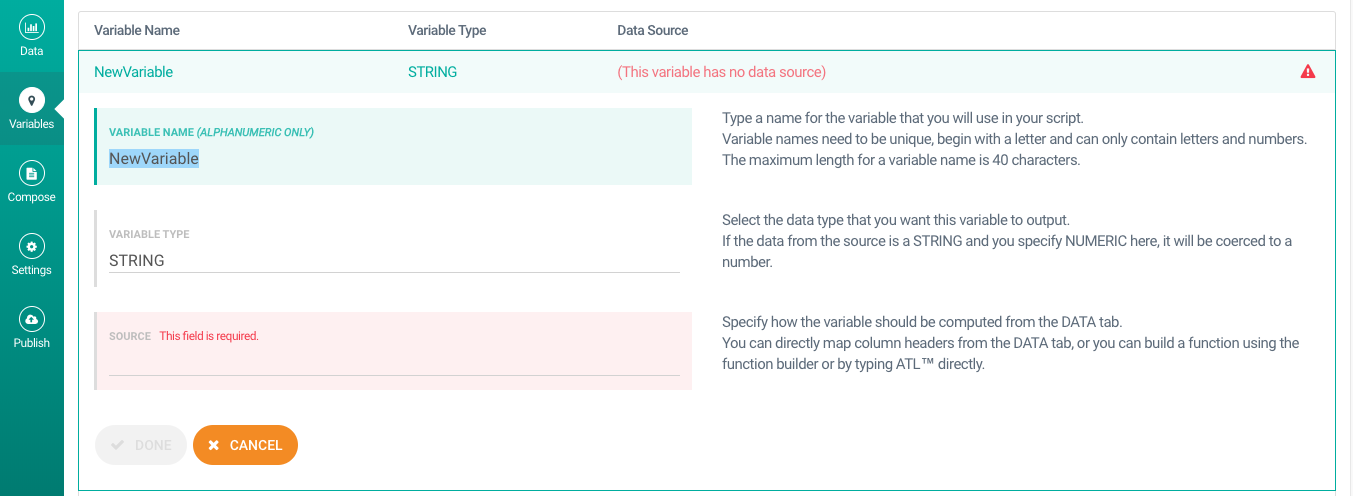
Initially, there is an orange warning that the variable has no data source. Add the data source, name and type as described below. Then click the Done button to create your new variable.
Note
When creating a new JSON-type variable, the Choose root and Next node options do not appear until you select JSON in the SOURCE field.
Editing variables
To edit an existing variable, click its listing in the list of variables. This opens a dialog box where you can edit various aspects of the variable. Creating a new variable also opens the dialog. You can edit the following fields:
Variable Name. Create a name for your variable or change an existing name here. The new name must adhere to the rules for Studio variable names.
Variable Type. Change the type of the variable here. This can be useful if you want to treat the data differently. For example, you might want to treat certain numerical values (such as part numbers) as strings so that Studio’s built-in number formatting doesn’t change the printed value in undesirable ways.
Data Source. For convenience, the Source field allows you to select a data source from the available set of column headers, but you can specify any ATL expression as the source. You can build up arbitrarily complex functions in the Data Source field, so that, for example, you can apply computations to the data source to derive a new value that you will use in your scripts. You can perform any computation here that you might carry out directly in a script; however, it is often convenient to hide this detail in a variable definition so that the apparent complexity of your script is reduced.
When you have finished making changes to a variable definition, click the Done button.
Note
In some circumstances, the dialog may complain that the variable does not have a data source, but this is a warning rather than an error. Sometimes, for example, you might choose to specify the source of a variable as being a specific constant value, rather than being based on some element in your data table.
Duplicating variables

In some cases you may want to create a new variable that is similar to an existing variable. To do this, use the Duplicate Variable icon in the right edge of the variable's row in the Variables list.