Publishing a project
You’ve now built a reasonably sophisticated NLG Studio application, and doing so has exposed you to a wide range of the features made available by the tool. Congratulations!
Now let's publish your application so that you and others can use it.
Click Publish in the left-hand navigation ribbon. This will take you to the Publish view.

There can be only one published version of a project. If you have published the project before, that version will be replaced by when you publish again. If you don't want to overwrite a previous version, create a copy of the project (see Project Portal > Cloning a project) and publish that instead.
Click the PUBLISH button in the top right corner of the screen.

Important
NLG Studio cannot publish a project containing syntax errors. If there are syntax errors, a warning message appears telling you how many of your scripts contain an error. It also includes a button that returns you to Compose View, where you can use Preview to investigate the errors in greater detail.
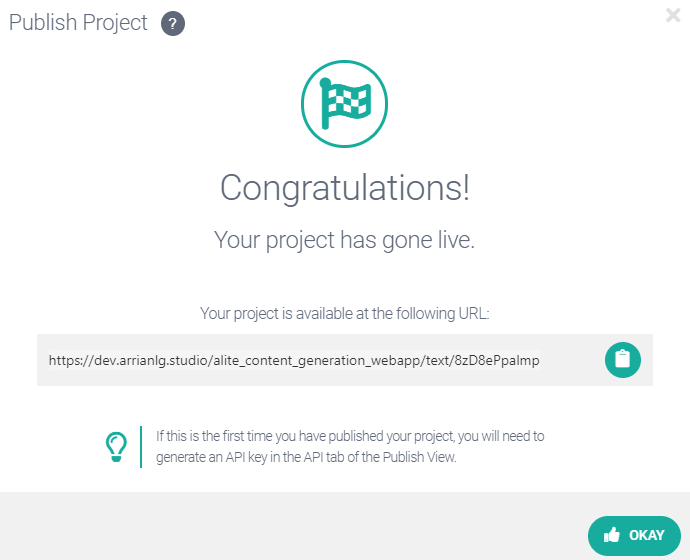
When you click Publish (assuming there are no syntax errors!) you are shown the API endpoint for your published project. You will use this if you want to use the application dynamically as part of another web application. For further information, see Deploying an NLG Studio app.

Click OKAY.
Go to the Project Portal by clicking on Studio in the top-left corner of the screen.
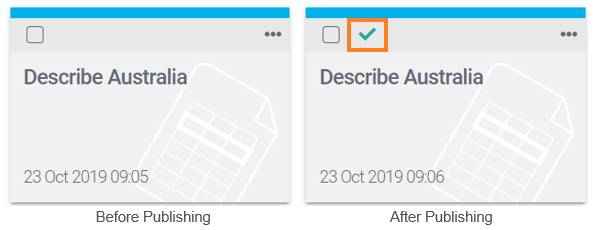
When using the portal in Tile Mode, the presence of a green tick on the project tile indicates that the project has published:

(If using the portal in List Mode, the green tick will be visible in the Published column.)
Re-open your project and return to the Publish view.

You now have two options. You can either: (1) run the published version from inside Studio with a new set of data, or (2) run it with the sample data (the data we used for this tutorial). Let's select the second option.
Click RUN WITH SAMPLE DATA.
Once the run is complete you will be offered a download of the results. This is a CSV file containing your input data (in this case the sample data) with an additional Generated Results column holding the generated story for each row of data.
Click SAVE RESULTS to download the file.
Optional exercise: Run with new data
Make a copy of the sample data file used in this tutorial (it should still be saved in the your downloads folder).
Change the data values.
Important
You MUST keep the column headers intact (the application won't be able to accept the data file if you change them), but you can change the data values arbitrarily.
Save your edited data file.
Navigate to the Publish view and click the RUN WITH NEW DATA button. A window appears that allows you to upload your new data file.
Upload your new data file.
Click SAVE RESULTS in the pop-up window. This will download the CSV data file with a Generated Results column added.
You're finished! You've successfully built an NLG Studio application and deployed it to the cloud.
There's a lot more in NLG Studio than we've been able to cover in this tutorial. We recommend you browse this documentation to find out more.