Project Portal
The Project Portal is where you land when you log into Arria Studio. Here you can create new projects, organize your projects into folders, clone and delete projects, and import and export projects.
The portal has two modes: Tile Mode and List Mode. You can perform all tasks in both modes — the significant differences are in how they display information. Both modes and all key features are described below.
Index
Tile Mode
The portal opens in Tile Mode when you log into Studio as a first-time user. For all subsequent logins, the portal opens in whatever mode was selected when you last logged out.
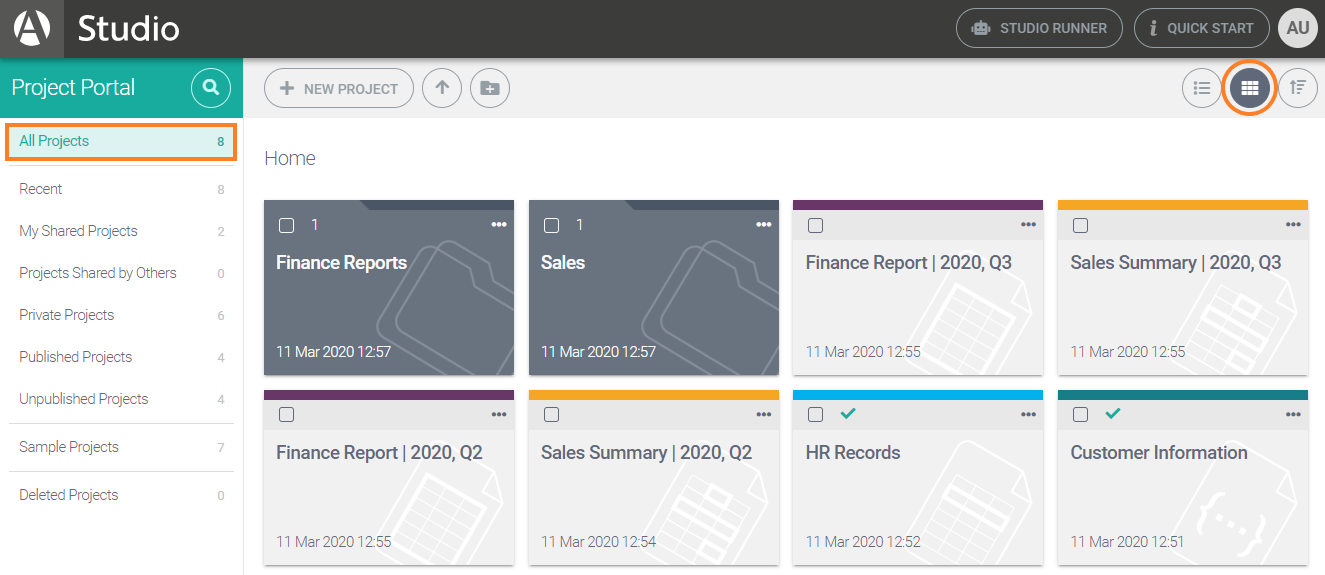
The portal has nine different views. These are displayed in a pane on the left side of the screen. In the image above, the All Projects view is selected. This view shows all projects currently available to you.
View | Description |
|---|---|
All Projects | Displays all projects currently available to you. |
Recent | Displays the last 12 projects you worked on. |
My Shared Projects | Displays projects that you own and have shared with other Studio users. |
Projects Shared by Others | Displays projects that other Studio users have shared with you. |
Private Projects | Displays projects that you own and have not shared with other Studio users. |
Published Projects | Displays your published projects. |
Unpublished Projects | Displays your unpublished projects. |
Sample Projects | Displays some sample projects that you can clone and then adapt as required. |
Deleted Projects | Displays deleted projects that can restore or delete permanently. |
If you create folders, a folder's content — that is, the number of visible projects — varies depending on the selected view. Therefore, the views serve as filters, making it easier to locate specific projects.
Folders do not appear in Recent, Sample Projects, or Deleted Projects: these views show projects only.
Creating a project
To create a project, click NEW PROJECT and select from the options.
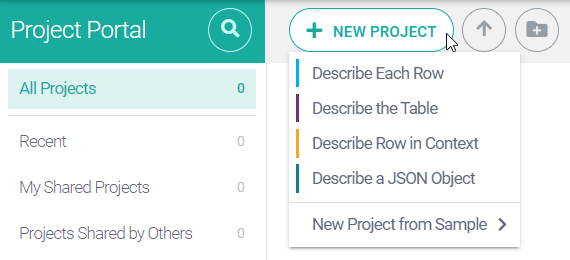
Click one of the first four options to create a project from scratch. See Projects for help choosing the most suitable type for your needs. Once you have named the project, you are taken to the project's Data View where you are prompted to upload sample data.
Alternatively, create a project by cloning a sample project. These have data already uploaded, and you can edit and adapt the project however you like. To do this, hover over the New Project from Sample option and pick a sample project from the options.
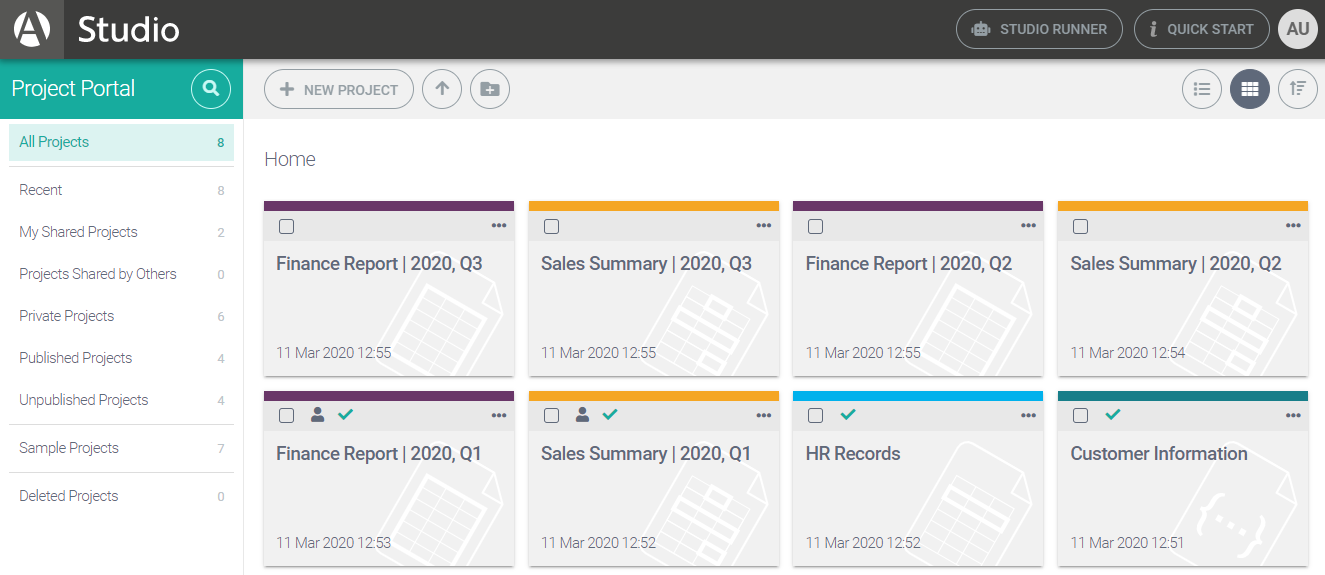
Here is the portal in Tile Mode (with Recent view selected) after the creation of multiple projects:
Tip
By default, projects appear in last-updated order. Click the Sort Order button to change this.
Project tiles
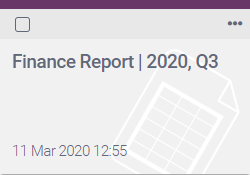
In Tile Mode, there is a tile for each project. To open a project, simply click the main body.
The color band indicates the project type.
Color | Project Type |
|---|---|
Blue | Describe Each Row |
Purple | Describe the Table |
Yellow/Gold | Describe Row in Context |
Dark Turquoise | Describe a JSON Object |
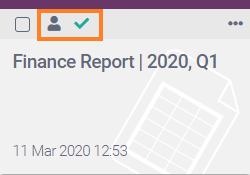
A person icon shows that the project is shared. For more about sharing projects, see Settings > Team Working.
A green tick shows that the project is published. For more about publishing projects, see Publish View.
Project folders
Once you have several projects you may wish to organize them into folders.

To create a new folder, click the New folder button and name the folder as required.
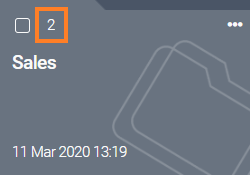
Among other details, a folder tile displays the total number of projects in the folder, including those in subfolders.
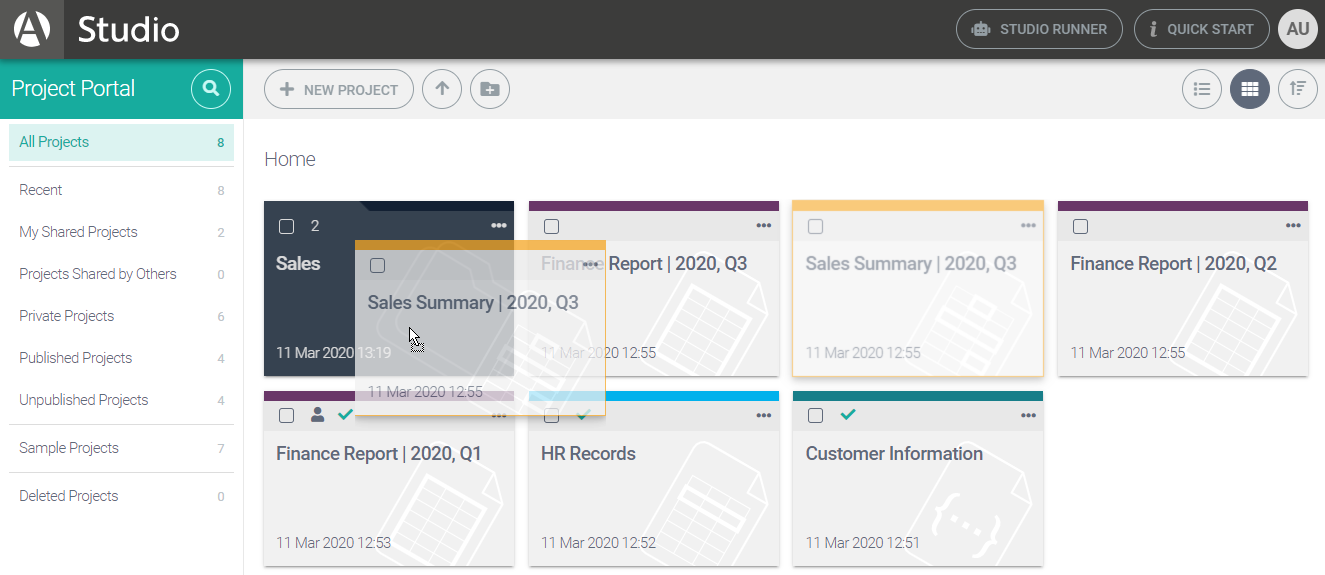
You can move projects into folders using drag and drop.
Click a folder tile to open it. Once inside a folder, you can create further folders inside that folder, and so on. Note that a breadcrumb trail (folder path) is displayed above the project tiles to show where you are.
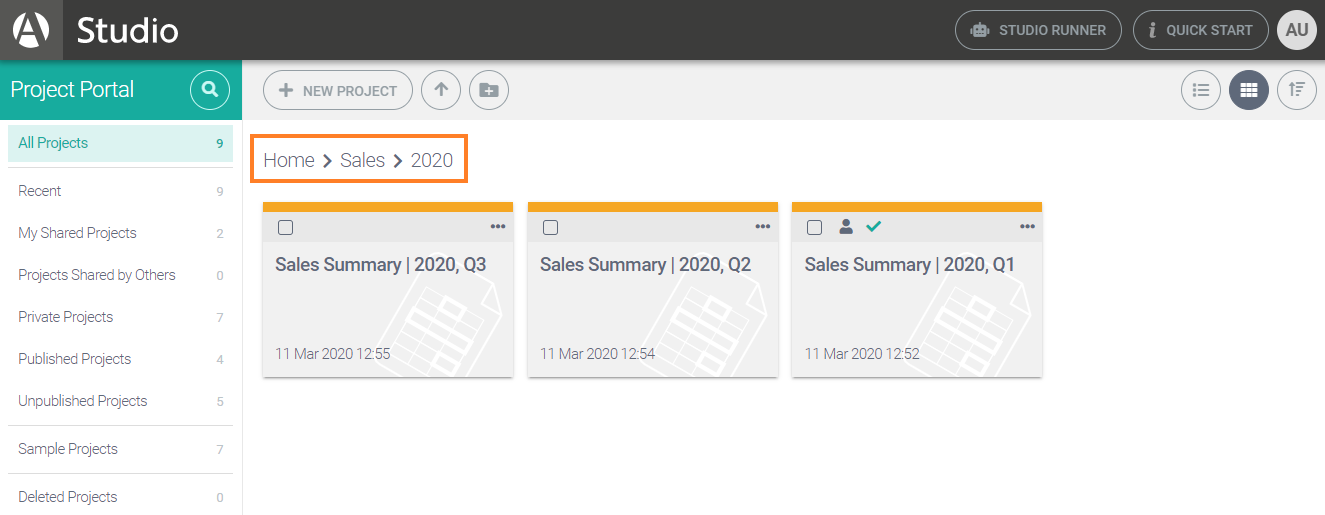
Click parts of the breadcrumb trail to move around your folder structure.
To move projects or folders, drag and drop them onto a part of the breadcrumb trail.
Selecting and changing folders
To select a folder, click in the square box located in the top-left corner of its tile.
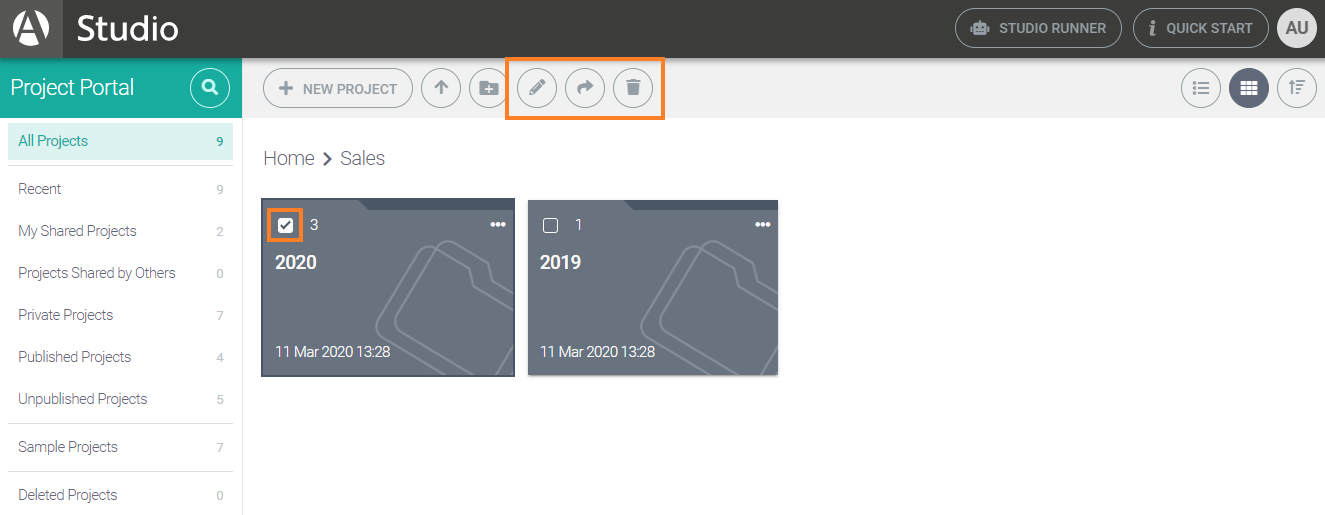
To move a folder, select it and click the Move to button (the arrow icon). This opens an easy-to-navigate menu from which you select the destination. This is often the most efficient way to move multiple folders simultaneously. It also works for projects.
You can also move multiple folders via drag and drop. For example, if you have three folders selected and drag one folder to a different location, the other two selected folders move too. Again, this also works for projects.
Important
You cannot move a folder to a location that already contains a folder with the same name. Each folder in a specific location must have a unique name.
To rename a selected folder, click the Rename button (the pencil icon) in the toolbar.
To delete a selected folder, click the Delete button (the trashcan icon) in the toolbar.
Tip
You can also select the Move to, Rename, and Delete options from a folder's context menu. To open this, click the folder's triple-dot icon or right-click anywhere on the tile.
Selecting and moving projects
To select a project, click on the square box located in the top-left corner of the project tile.
Tip
You can select a group of projects that are next to each other by selecting one project, then holding the Shift key and selecting the last project. The same method works for folders.
One way to move multiple projects together is to select the projects, click Move to (the arrow icon) in the toolbar, and then choose a destination from the dropdown menu.
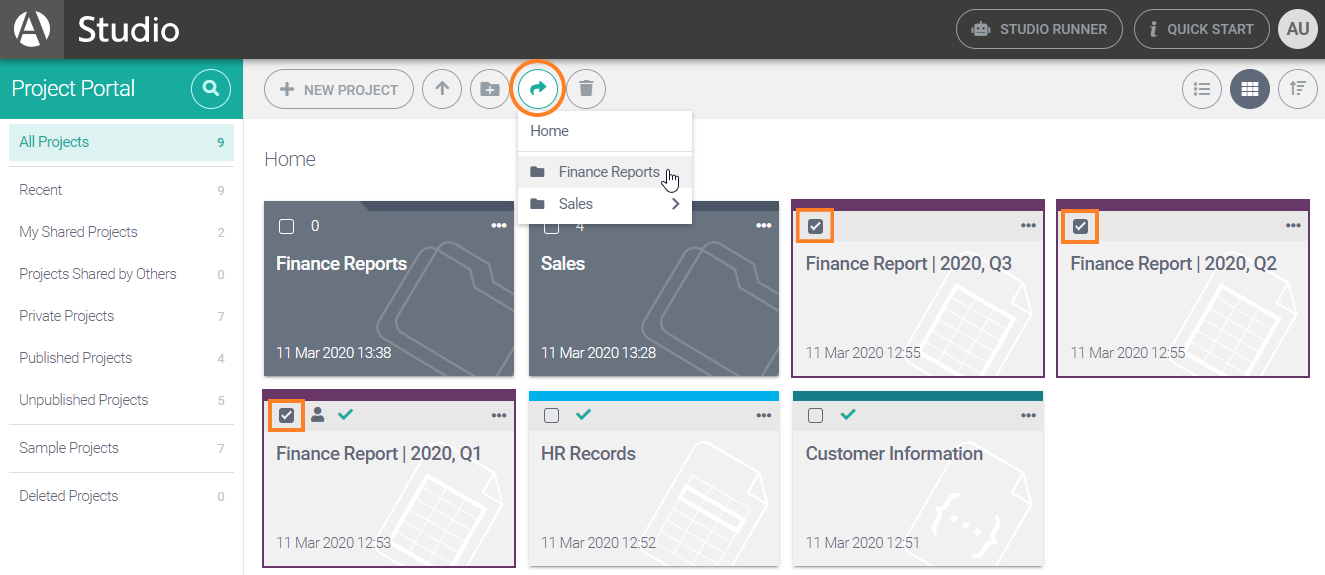
Alternatively, you can drag and drop selected projects into the intended location (e.g. a folder or part of the breadcrumb trail). This moves all selected projects. You can also move a single project by opening its context menu and selecting Move to.
Tip
It's often easier to drag and drop projects in List Mode, which allows you to view your entire folder structure on one screen.
Renaming projects

Select the project, then click the Rename button in the toolbar. Alternatively, open the project's context menu and select Rename.
Cloning projects

Select the project, then click the Clone button in the toolbar. Alternatively, open the project's context menu and select Clone. You will have the chance to rename the project, after which it will open for editing.
Cloning a project creates a new project that has the same data, variables, and scripts as the original project. The edits you make to the clone project do not affect the original project, so this is a good way to experiment with changes.
Deleting projects

Select the project, then click the Delete button in the toolbar. Alternatively, open the project's context menu and select Delete.
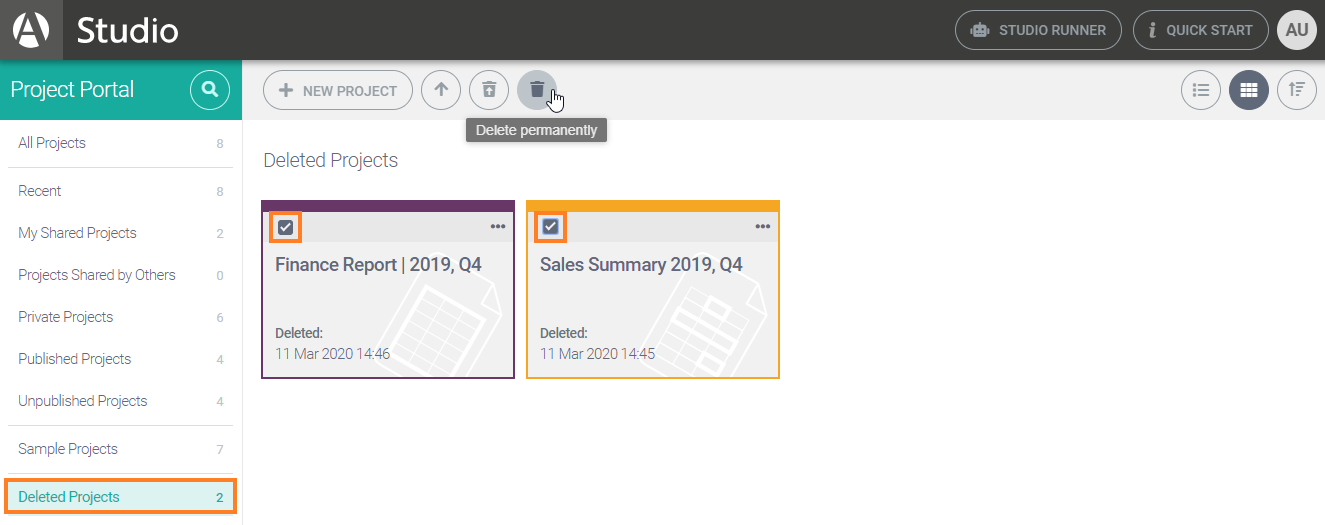
All deleted projects are visible in the Deleted Projects view; from here you can restore projects or delete them permanently. In the screenshot below, two selected projects are about to be deleted permanently.
Note
In the Deleted Projects view, the trashcan icon in the toolbar becomes the Delete permanently button. You can also select Delete permanently option from the project's context menu.
Restoring projects
When you select a project in the Deleted Projects view, the following buttons appear at the top of the screen:

To restore a project, select it and click the Restore project button (highlighted above) at the top of the screen. Alternatively, click the three dots on the project tile and select Restore project.
Note
All projects are restored to the top level of the All Projects view.
Exporting projects

Select the project, then click the Export button in the toolbar. Alternatively, open the project's context menu and select Export. This exports a project file (in JSON format) that you or others can import into the portal.
Note
You cannot export multiple projects simultaneously.
Importing projects
The easiest way to import a project is to drag and drop the project file into the main portal pane, as shown below.
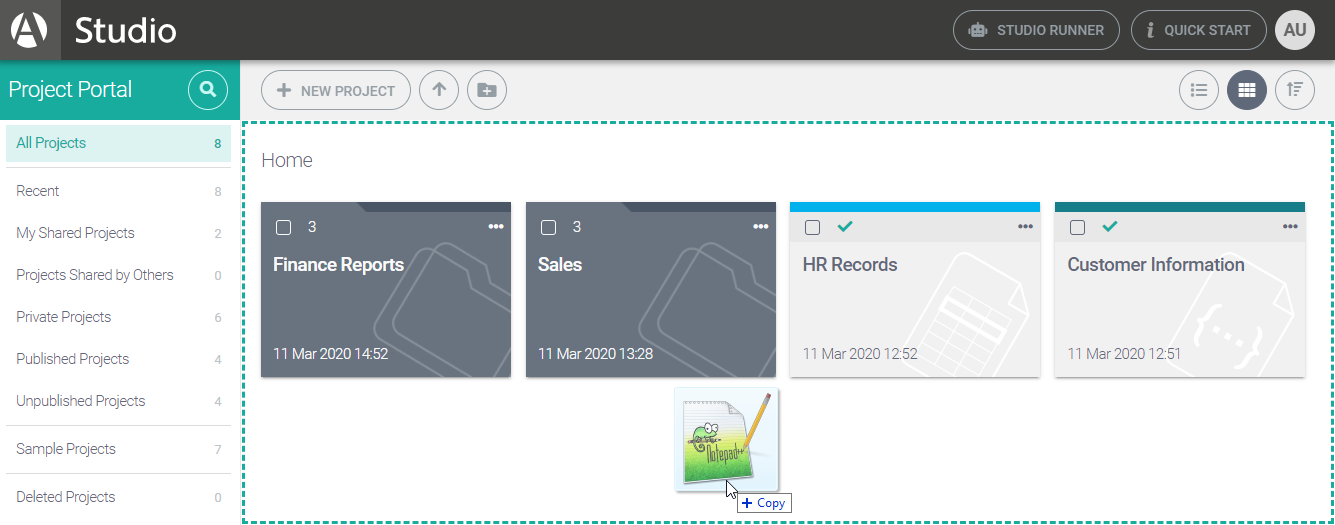
In the image above, the All Projects view is selected. You can import a project when any view is selected, but Studio automatically switches to All Projects if you import while using a view (e.g. Published Projects) that doesn't display newly imported projects.

An alternative to drag and drop is to the click Import Project button at the top of the screen, then select the project export file. You can do this while in a folder or in the top level of your folder structure; wherever you are, the project is imported to that location.
You can import a project straight into a folder using drag and drop. Alternatively, open the folder's context menu and select Import Project. When you import directly into a folder, that folder opens to display the project.
Note
You cannot import multiple projects simultaneously.
List Mode
List Mode has the same features as Tile Mode but changes the display so you can view the content of multiple folders at once. To switch to this mode, click the List Mode button in the top-right corner of the UI.
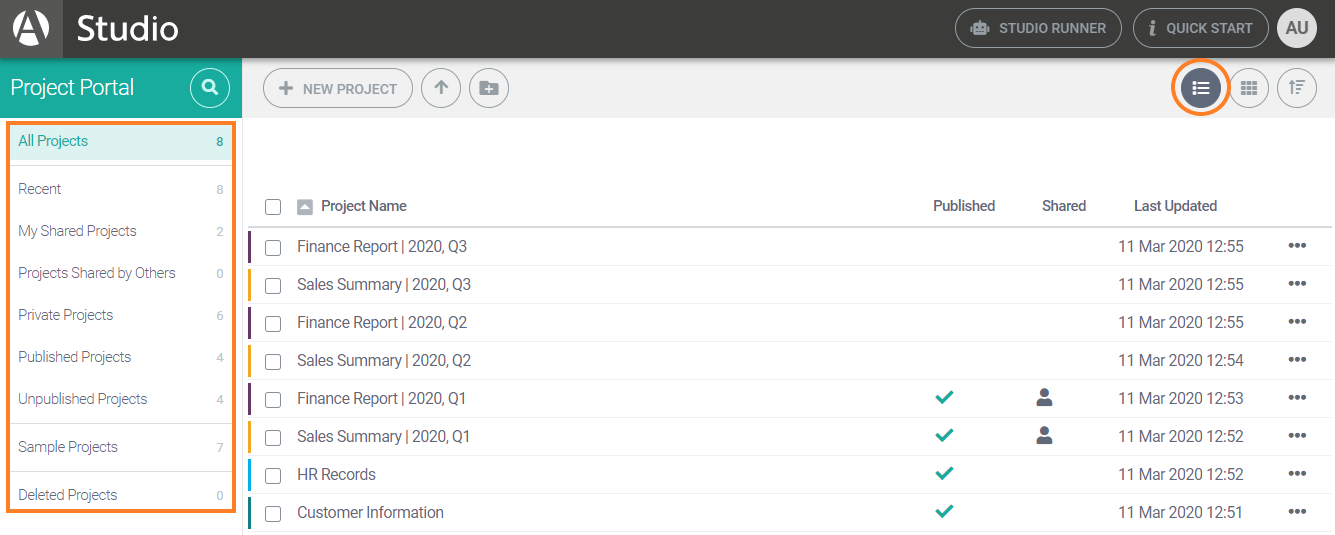
The views pane on the left of the screen remains the same, so you can still change between the nine views described earlier. As in Tile Mode, the toolbar changes when you select projects or folders.
As highlighted in the image below, each project/folder has a select checkbox and a triple-dot icon for accessing its context menu. These work the same as in Tile Mode.
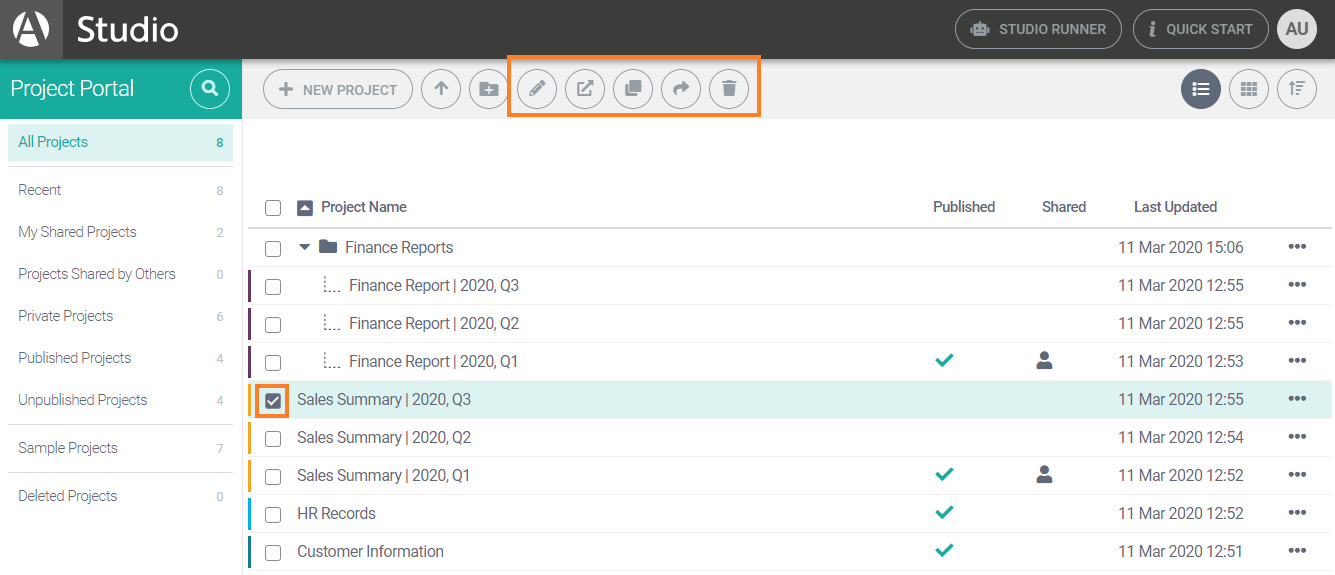
Viewing folders in List Mode
In List Mode, you expand a folder to see its content by clicking the arrow beside it.
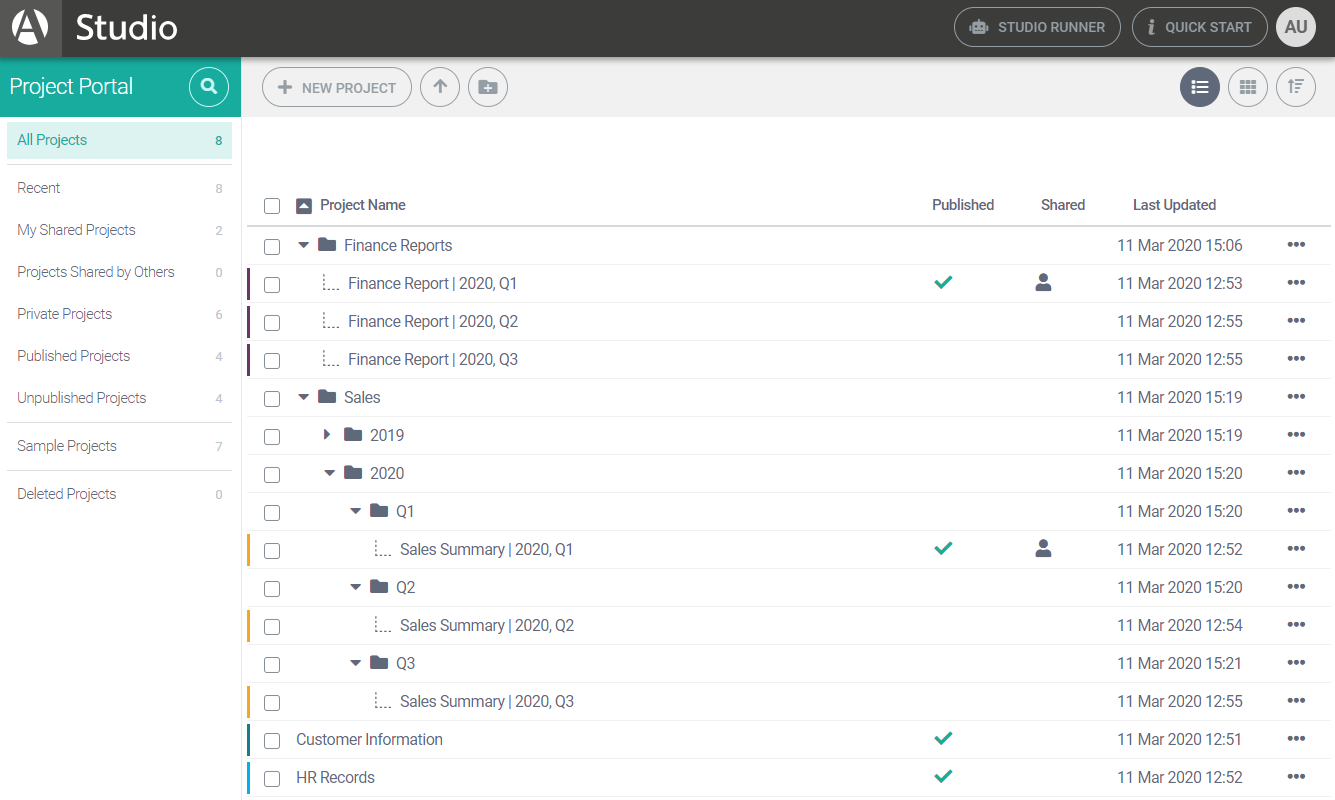
An advantage of this is you can view the content of multiple folders at the same time (in Tile Mode you can view only the content of your current location). This is particularly useful when you need to move projects and folders to different locations within your folder structure.
Tip
The toggle to the immediate left of the Project Name column header instantly collapses or expands all folders.
Creating projects and folders in List Mode
You can't move inside a folder in List Mode, but you can create new projects/folders within an existing folder. For example, suppose you have the folder structure shown below and want to create a Q4 folder to sit inside the 2020 folder. The quickest way is to right-click the 2020 folder and select New Folder from the menu.
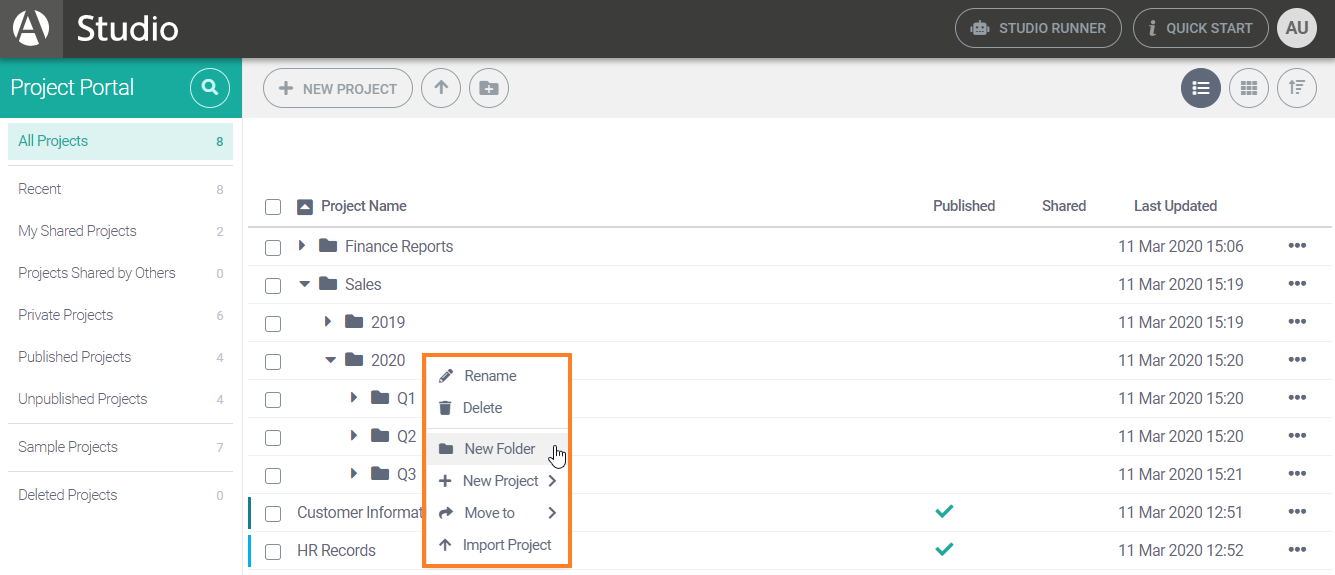
As you can see, a new folder is created within the 2020 folder and is ready to be named.
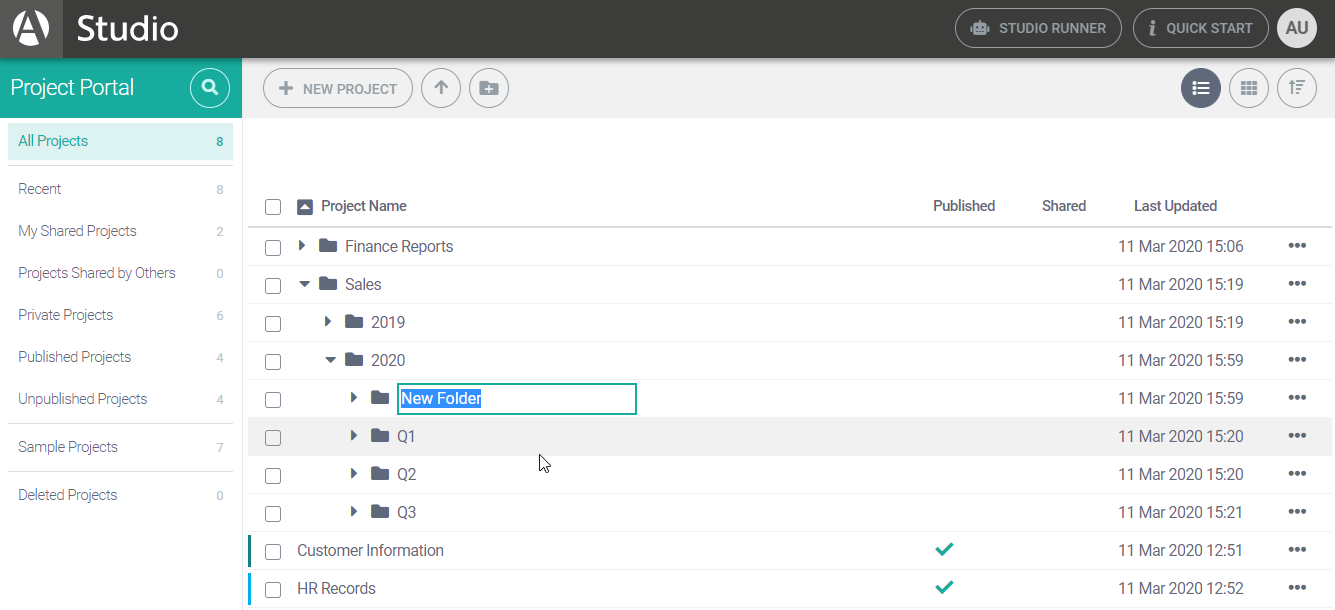
Tip
The method shown above also works for creating new projects inside a folder.
Tip
An alternative to right-clicking is to click the folder's triple-dot icon (right side of the screen).
Sorting content
In both Tile Mode and List Mode, the system default is to display projects in the last-updated order. To change the sort order, click the Sort Order button in the top-right corner of the screen and select your preference.
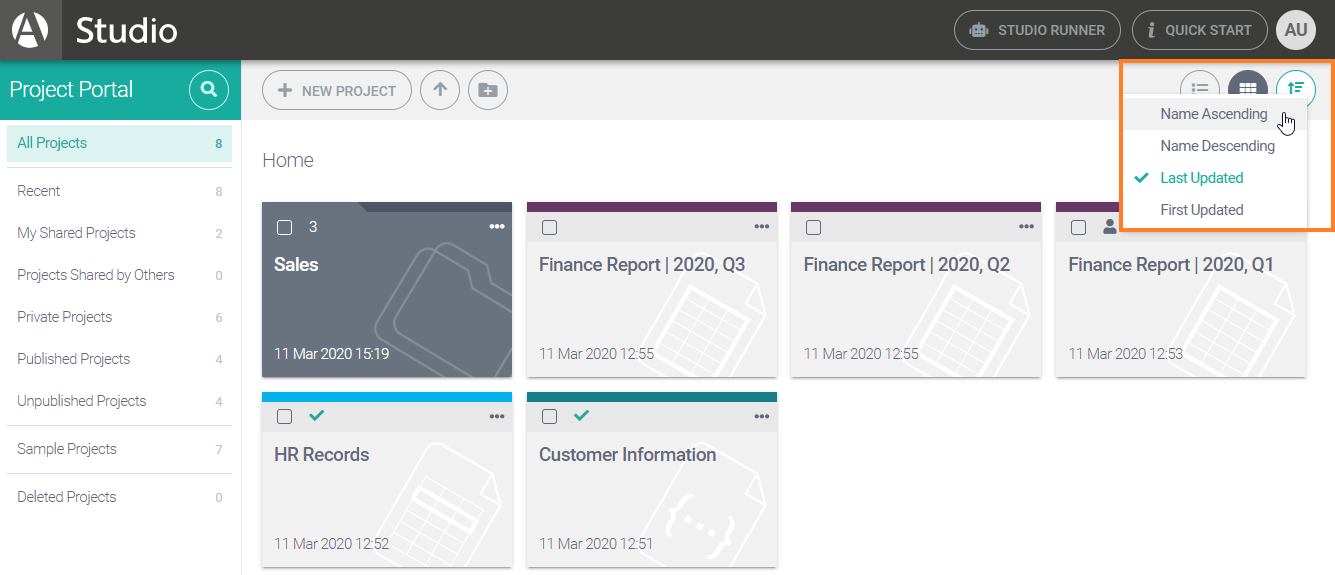
If you change the sort order in one view, the same order applies when you move to other views. The exceptions are (1) Recent, which always uses last-updated order; and (2) Sample Projects, which has its own fixed order.
Searching content
To search for a specific project or folder, click the Search button in the top left of the UI.
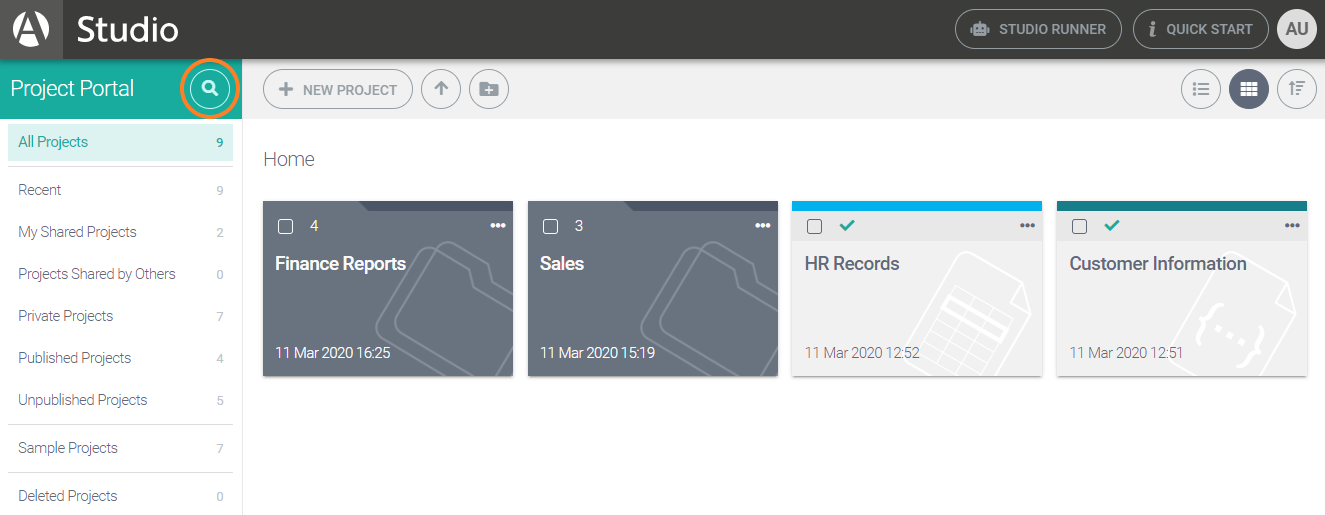
This takes you to another view, which includes a search field at the top of the screen. Enter your search terms and a flat list of all matching projects and folders appears only.

Clicking the Back button (the arrow icon) to return to the view you were using previously.
Note
The search feature is case-insensitive.
Sample projects
The Sample Projects view displays some sample projects.
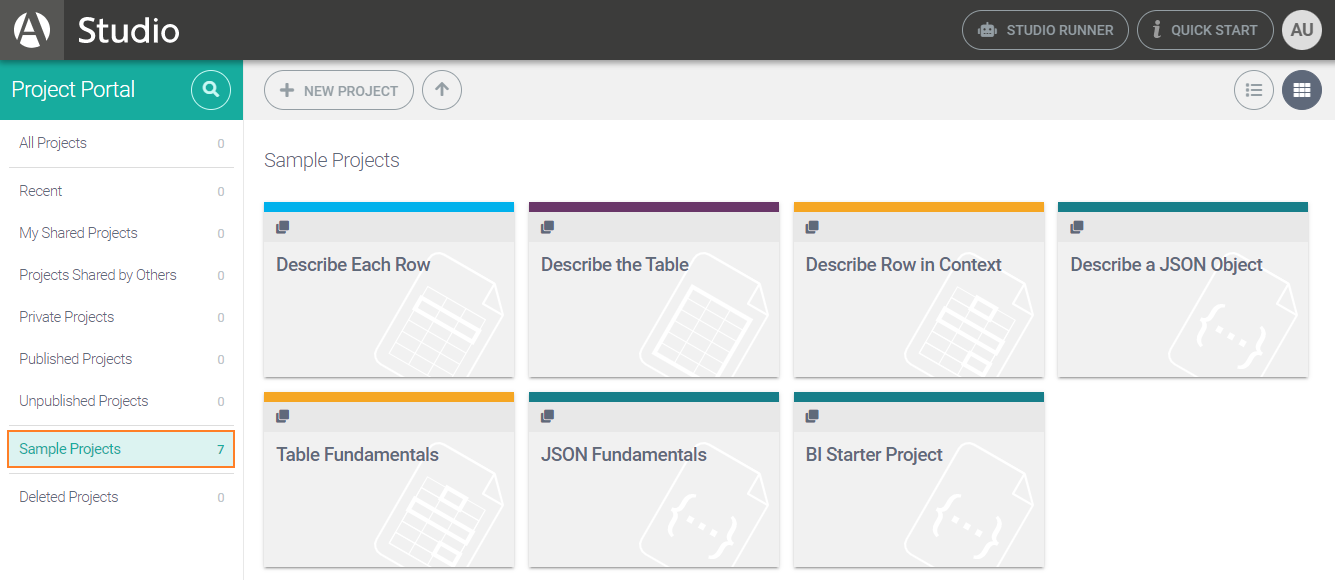
When you click a sample project tile, a duplicate project is created (the portal automatically switches to All Projects view) for you to rename. Once renamed, the project opens automatically for you to edit.
You can also create a duplicate of a sample project by clicking the NEW PROJECT button, hovering over the New Project from Sample option, and choosing a sample project from the dropdown list.
Miscellaneous
This section briefly explains the three buttons that always appear in the top-right corner of the portal.

Launch Studio Runner
The STUDIO RUNNER button is a link to our Studio Runner web page. This allows you to submit data to your project's API endpoint. Refer to our Studio Runner documentation for further guidance.
Open Quick Start
Need help? Click the QUICK START button. This opens Studio Quick Reference, our in-app help widget. This guides you to the Getting Started tutorials, links you to function documentation, and suggests useful help topics.
If Studio Quick Reference is unavailable, you'll see this icon instead of the QUICK START button.

This takes you to relevant content in the Studio documentation. For example, if you click this icon while in the Project Portal, it will take you to the help topic that you're reading now.
User Menu
This User Menu button shows the initials of your username (it shows "AU" above for "A User"). Clicking this opens the user menu. For more information, see User Interface > User Menu.