User-defined functions
As the name implies, a user-defined function (UDF) is one you create yourself.
In Studio, you write a UDF as a parameterized script — that is, a script written to take parameter values that vary the script's output. There are two types of parameterized script:
Type | Description |
|---|---|
| A |
| A |
We have organized the topic into these sections:
Writing #value scripts
#value scripts return one value — nothing else. The value is the output from the script's last ATL statement.
The formatting and layout has no effect on the return value. You can lay out a #value script however you like, without worrying that layout features (line breaks, indentation, etc.) will appear in the calling script.
Syntax for #value scripts
#value functionName(parametersList) [[ functionBody ]] |
Element | Description |
|---|---|
| This defines the script as a |
| The function name. This must match the name you give the script. |
| The function parameters. You must include the opening and closing round brackets, even when the function takes zero parameters. For multiple parameters, enter a comma-separated list — e.g. |
| The opening square brackets — these define the start of the function body. |
| The function body — the ATL that defines what to with the parameter inputs. |
| The closing square brackets — there should be nothing in the script after these. |
Examples — #value scripts
Here's a very simple #value script:
#value displayFullDate(dateString)

[[formatDateTime(dateString, 'EEEE d@ MMMM yyyy')]]
The script creates a user-defined function named displayFullDate. The function takes a single parameter (dateString). The function takes the input value — which should be a date-only string — and reformats it using the formatDateTime function.
Important
You must define a UDF — #value or #define — in its own script and give that script the same name as the function. In this case, the script name must be displayFullDate.
You would call this function in another script. For example:
ATL in Script | Result |
|---|---|
| Friday 26th February 1982 |
In this case, you might wonder why creating a UDF is necessary, as you could achieve the same effect by applying the formatDateTime function to your date-only string. For example:
ATL in Script | Result |
|---|---|
| Friday 26th February 1982 |
But suppose you want to apply the same formatting to multiple date values in your project. Using the UDF saves you having to define the format string in each function call. More importantly, if you subsequently decide to change the formatting, you make the necessary code change in just one place — in the #value script.
Here's a more complex #value script:
#value formatCurrency(inputNumber)

[[

if(abs(inputNumber) >= 999950)
[[precision(abbreviateNumber(currencyFormat(inputNumber), '', 'none', 'M'), 2, false)]]

elseif(abs(inputNumber) >= 999.5)
[[precision(abbreviateNumber(currencyFormat(inputNumber), 995.5, 'K'), 1, false)]]

else[[currencyFormat(inputNumber, '', '¤#,##0')]]

]]
This creates a UDF called formatCurrency. Again, the function takes one parameter (inputNumber). The function takes the input number and returns it with currency formatting. Conditional variation ensures the formatting varies depending on the size of the input number.
Remember, you can add comments to ATL. For example:
#value formatCurrency(inputNumber)

[[

// for rounded-up values in the millions, abbreviate to 2 DPs and keep trailing zeros

    if(abs(inputNumber) >= 999950)
    [[precision(abbreviateNumber(currencyFormat(inputNumber), '', 'none', 'M'), 2, false)]]

// for rounded-up values in the thousands, abbreviate to 1 DP and keep trailing zeros

    elseif(abs(inputNumber) >= 999.5)
    [[precision(abbreviateNumber(currencyFormat(inputNumber), 995.5, 'K'), 1, false)]]

// for rounded-up values of three digits or fewer, don't abbreviate and display as integer

    else[[currencyFormat(inputNumber, '', '¤#,##0')]]

]]
Tip
To indent lines of code, use the Increase Indent and Decrease Indent buttons.

The function body for formatCurrency is a conditional statement that uses three ATL functions — currencyFormat, abbreviateNumber, and precision — in multiple places. Imagine writing this every time you need to format a number! It's better to write the code once in a UDF script and call that script when needed. For example:
ATL in Script | Result |
|---|---|
| $123 |
| -$123 |
| $1.2K |
| $1.23M |
Note
The examples above — displayFullDate and formatCurrency — take just one parameter. See Combining #value and #scripts for a more complex #value example.
Writing #define scripts
A #define script can contain a mixture of fixed text and ATL. Essentially, a #define script is the same as a regular script except in one respect — it takes parameter values that vary the script output.
The output is always text, so #define scripts are ideal for generating narrative content. Like with regular scripts — but unlike #value scripts — layout features in a #define script (line breaks, paragraph breaks, etc.) are included in the text output returned from the script.
Important
When a #define script produces more than one paragraph, this text output is treated as a new paragraph when inserted into the calling script. If the script produces just one paragraph, no new paragraph is triggered in the calling script, so the output text can appear mid-sentence.
Syntax for #define scripts
#define functionName(parametersList) narrativeContent |
Element | Description |
|---|---|
| This makes the script a |
| The function name. This must match the name you give the script. |
| The function parameters. You must include the opening and closing round brackets, even when the function takes zero parameters. For multiple parameters, enter a comma-separated list — e.g. |
| Script that generates a piece of narrative text. Typically, this is a mixture of fixed text and ATL blocks, with the ATL modifying the parameter input values. See below for examples. |
Examples — #define scripts
For this example, we'll use a simple JSON dataset:
{
    "month": "November",
    "year": "2022",
    "offices": [
        {
            "name": "Los Angeles",
            "sales": 85320,
            "target": 75000,
            "manager": "Frank Langford"
        },
        {
            "name": "Houston",
            "sales": 70530,
            "target": 75000,
            "manager": "Maria Oliveira"
        },
        {
            "name": "New York",
            "sales": 280425,
            "target": 200000,
            "manager": "Nikhil Patel"
        }
    ]
}
The "offices" array contains three JSON objects — one for each office. Suppose you want a summary for each office. You could write a separate script for each office, but it's more efficient to write one parameterized script that you can run with different input data. For this, we need to write a #define script.
Important
Download and open THIS EXAMPLE PROJECT to work through the example.
Open the downloadable project.
Create a script and call it DescribeOffice.
Add the following content:
#define DescribeOffice(x)

[[upper(x.name)]]

Sales in [[x.name]] totaled [[formatCurrency(x.sales)]], [[x.sales > x.target ? 'exceeding' : 'missing']] the [[formatCurrency(x.target)]] target by [[abs(percentageChange(x.sales,x.target))]]%.

The office manager is [[x.manager]].
Highlight the
[[upper(x.name)]]block, click the ¶ icon in the toolbar, and select Heading 4 from the list.Your script should look like this:

The
DescribeOfficeUDF takes one parameter (x). The intended input is a JSON object from the "offices" array. Dot notation is used to get values from the input object — e.g.[[x.name]]gets the name value.The script's fixed text won't change, but the ATL outputs will vary depending on the input object.
Tip
If preferred, you can use bracket notation — e.g.
[[x['name']]]— instead.Go to the Main script and add
[[DescribeOffice(WholeJSON.offices[0])]], as shown below: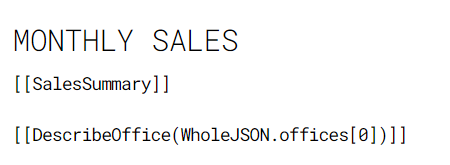
This calls the
DescribeOfficeUDF. The input is the first object in the "offices" array.Click Preview. You should see this:
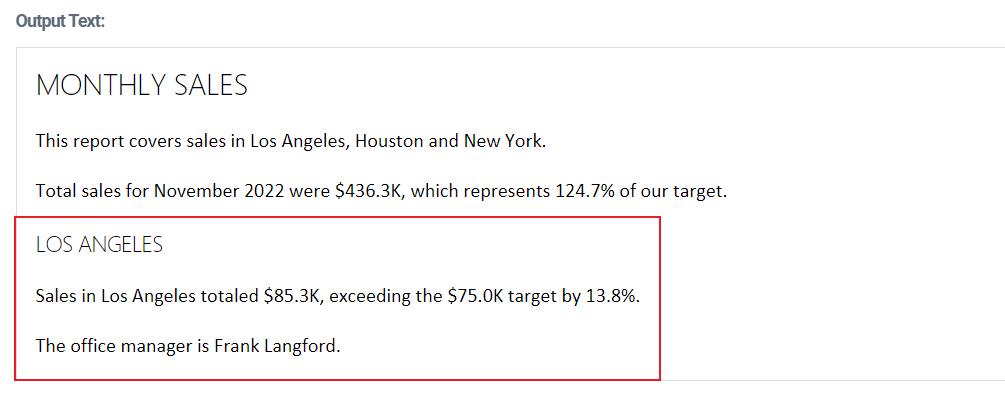
Now let's call the
DescribeOfficeUDF and input ALL objects in the "offices" array.Still in the Main script, change the last ATL block to:
[[forAll(WholeJSON.offices, DescribeOffice)]]
This ATL uses the forAll function to loop through the "offices" array and apply our
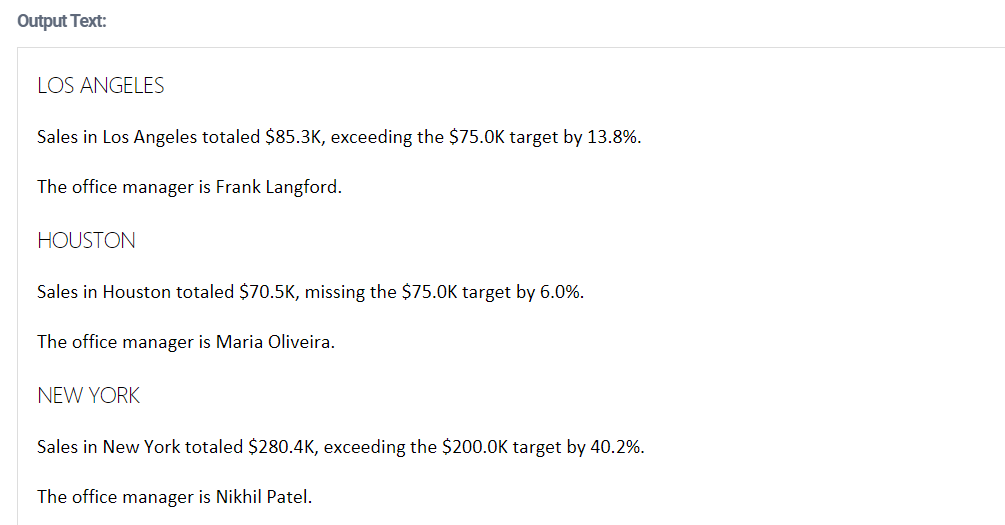
DescribeOfficeUDF to each value in that array — that is, to each JSON object.Click Preview. You should see a summary for each office.
Return to the script for
DescribeOfficeand insert a horizontal line before the[[upper(x.name)]]block.
Once done, your script should look like this:

Notice the thin horizontal line after the script's first line.
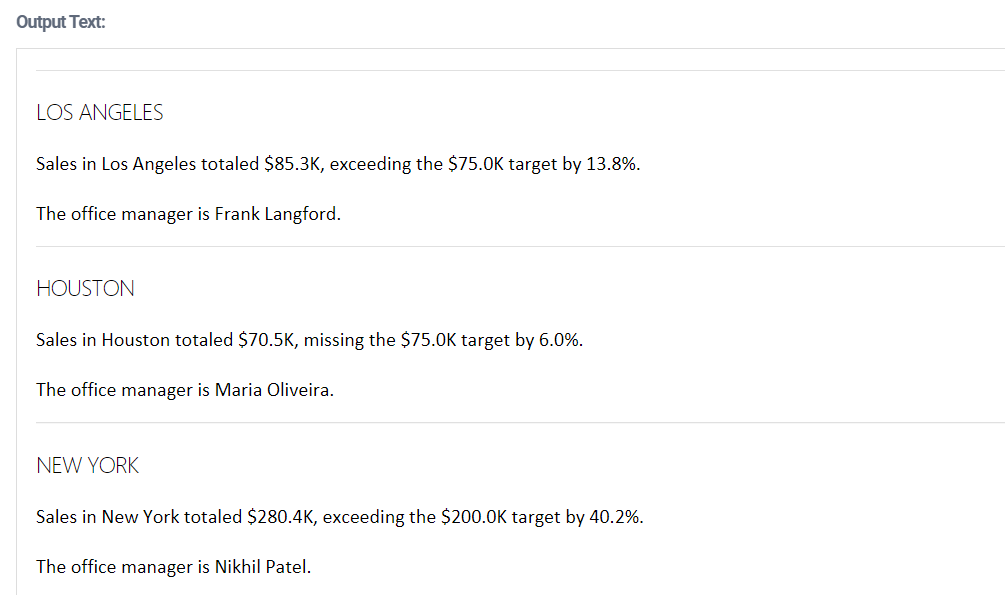
Preview the Main script. You should see a horizontal line before each office summary.
Combining #value and #define scripts
In complex projects, it's best practice to separate your analytics scripts from your narrative scripts.
#value scripts are best for producing analytics, while #define scripts are best for producing narrative.
A common approach is to create a analytics results object — for example, an ATL object — by writing a #value script, then run that results object through a #define script to produce narrative.
Important
Download and open THIS EXAMPLE PROJECT to work through the example.
Select the summaryAnalytics script.
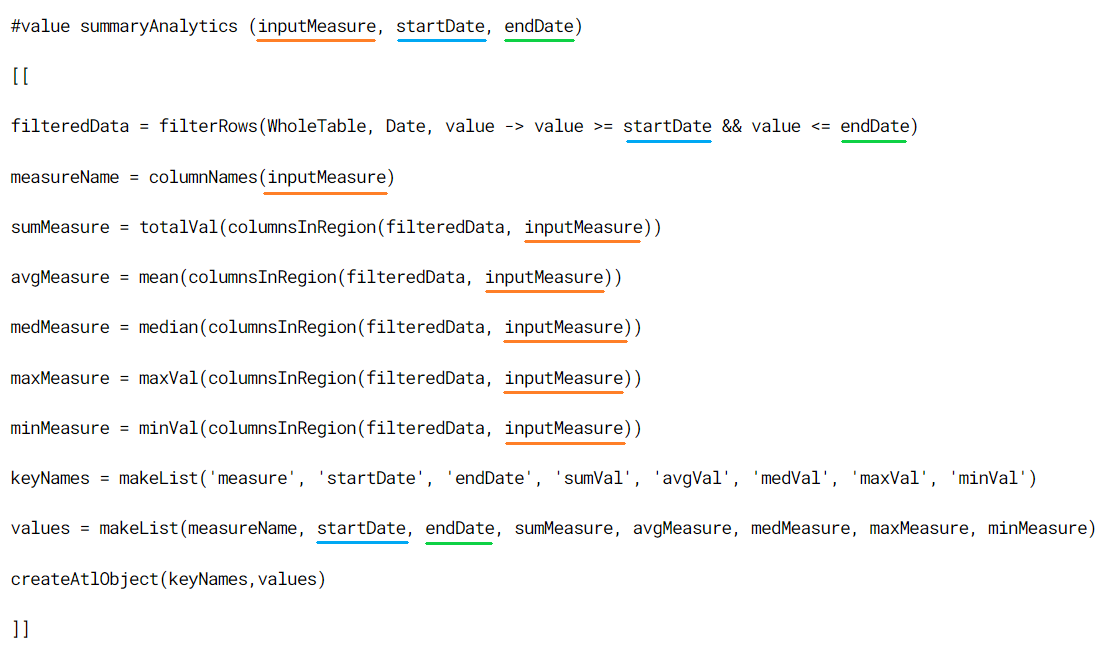
This
#valuescript has three parameters:inputMeasure,startDate, andendDate. The function filters the whole table to get the rows for a specific period and then calculates numerous data values for the input measure. These values are returned in an ATL object.The function uses the input values for
inputMeasure,startDate, andendDatein numerous places. We have highlighted this by adding color underlining to the image above. This does not appear in Studio.Go the Main script and add this line of code:
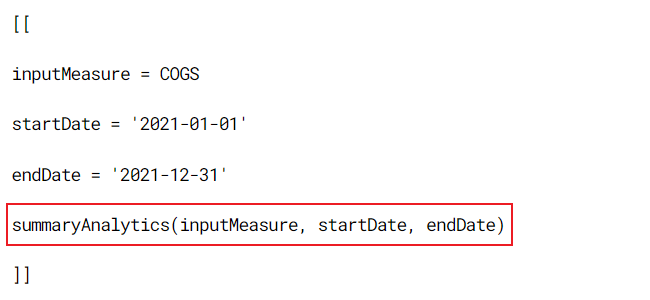
The fourth line in the block calls the
summaryAnalyticsfunction. The preceding three lines define the input values for the function's first, second, and third parameters. This ATL requests an analysis of COGS (input measure) for the whole of 2021.Click Preview. You should see this ATL object:

Important
Don't worry if the key–value pairs appear in a different order when you preview.
The ATL object contains eight key–value pairs. Some values (e.g. startDate and endDate) were fed into the function, while others (e.g. sumVal and avgVal) were computed by the function. Now you have the analytics data in a list-like structure, you can run it through a
#definescript to produce narrative.Select the summaryNarrative script.

Typically, the
#definescript contains a mixture of fixed text and ATL blocks. The script takes one parameter (results). The intended input is the ATL object produced by thesummaryAnalyticsfunction.The script uses dot notation to get values from the ATL object — for example,
results.startDategets the startDate value from the input object. We've added color underlining to the image to highlight this.Tip
If preferred, you can use bracket notation — e.g.
[[results['startDate']]]— instead.Return to the Main script and change the code to:
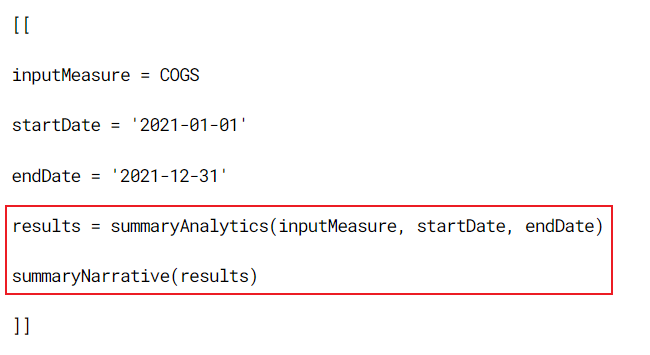
This calls
summaryNarrativeUDF and passes in the results from a call tosummaryAnalytics.Tip
If preferred, you could consolidate the fourth and fifth lines into a single line:
summaryNarrative(summaryAnalytics(inputMeasure, startDate, endDate))Click Preview. You should see this:

Still in Main, change
inputMeasureto Profit,startDateto '2021-04-01', andendDateto '2021-04-30'.Click Preview to re-run the Main script. You should see this:

This example shows the power of combining #value and #define scripts. You don't need separate scripts to analyze different measures or different time periods. Just change the input variables in the Main script and let the UDF scripts do the rest. Remember:
UDF Name | Script Type | Purpose |
|---|---|---|
| #value | Produces analytic data |
| #define | Produces narrative text |
Previewing user-defined functions
When you call a UDF script — #value or #define — you do so in another script (e.g. Main) and supply it with data. When you attempt to preview a UDF script directly, you call the function without passing in data. The parameter input values are null, so Studio returns errors.
However, there might be times when you want to preview the UDF script directly — for example, you might want to test your script while developing it. To get around the null-data problem, add a null catch for each parameter. The next example demonstrates this.
Important
Download and open THIS EXAMPLE PROJECT to work through the example.
Go the formatCurrency script and click Preview.
You should get this error message:

Add the highlighted code to the script.

This piece of code is a null catch. It catches when an input parameter value is null and replaces it with a suitable test value. In this case, it tells the function to use 1234 instead of null for the
inputNumbervalue.Tip
You must include the null catch at the start of the function body.
Click Preview to run the script. The return value should be £1.2K.
Change the test value to 2749450.23.
Click Preview to re-run the script. The return value should be £2.75M.
This method saves you the trouble of calling the UDF in another script for testing purposes. If you supply the UDF with data by using null catches, you can test the UDF without leaving the UDF script.
Tip
It's best practice to remove null catches once you know the UDF is working.
Using null catches also allows you to test selected parts of your UDF script — that is, to find what value the function returns at a specific point of its execution. To do this, use consolePrint. This ATL function generates a log entry in the Console log within Preview Mode.
Go to the summaryAnalytics script and add these null catches:
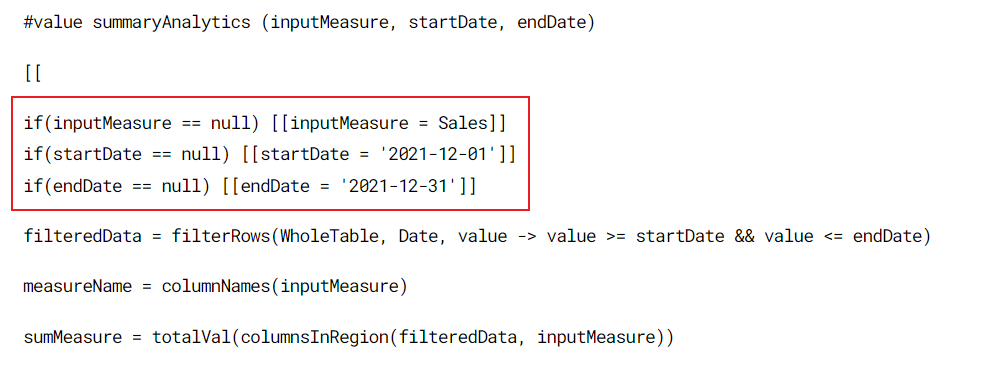
The
summaryAnalyticsfunction takes three parameters —inputMeasure,startDate, andendDate— and returns an ATL object of calculated values. Adding null catches allows you to preview the function output.Click Preview. This shows the result from the whole function.

Now, suppose you want to test what value the function generates at a specific point in its execution — i.e. after a particular ATL statement. You can do this with
consolePrint. For example, suppose you want to check the output for thesumMeasureline.After the
sumMeasureline, add the highlighted code.
When you hit Preview, you should see the full result (ATL object) in the main pane and a statement confirming the
sumMeasureresult in the Console log area. ThesumMeasurevalue should be 6,388,374.22.
You need null catches only when previewing the UDF script directly. Try removing the null catches from the summaryAnalytics script and running the whole project from the Main script. You'll find that
consolePrintstill generates a log statement.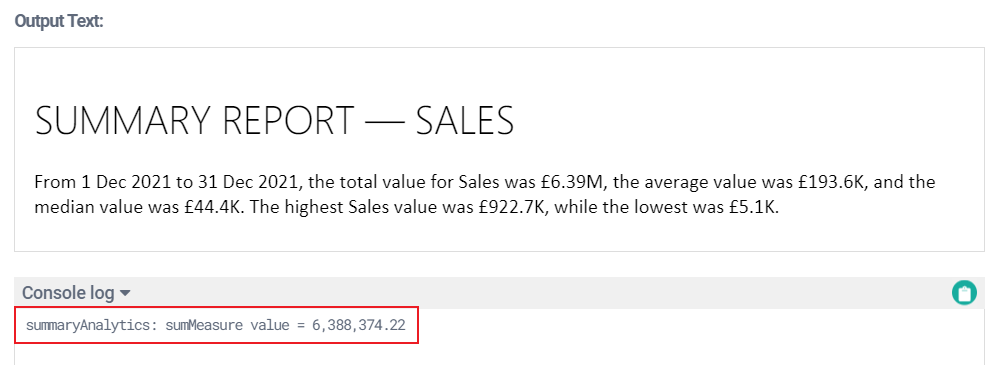
Using this approach, you can run the whole project and test what values your UDF scripts are generating at specific points in their execution. This helps to simplify testing and debugging.
Tip
See the consolePrint topic for guidance and more examples.